Archive / Baking

RSS feed for this section

Baking posts

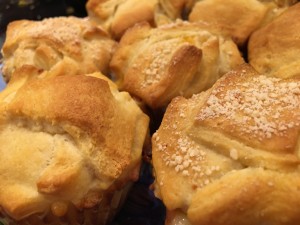
Pizza Muffins

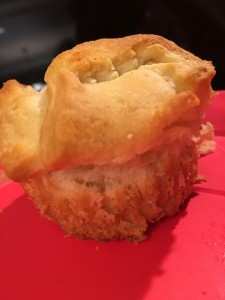
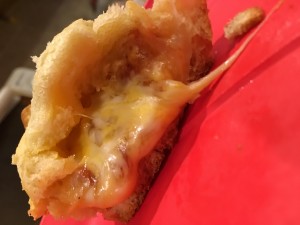
Pizza Muffin

What you’ll need:

One can crescent rolls

2 cups of shredded cheese (I used a mozzarella cheddar blend)

8 oz of spaghetti sauce

One TB butter

one non-stick muffin pan

Servings 4 (2 pizza muffins per person)
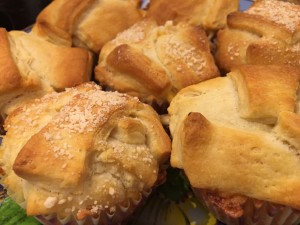
Pizza Muffin

Step 1:  Heat Oven to 350 degrees.

Step 2: Remove crescent rolls from package and cut each triangle (there are 8 per package) into about 12 pieces.  Each triangle cut up will make one muffin.  Set these aside.

Step 3: Time to start assembling your muffin.  Put about six pieces (half) of your cutup crescent triangle into one of your muffin cups.  (Don’t do what I did and use paper muffin liners.  Even though crescent rolls are very buttery, they will still partially stick to the liners. Use a non-stick muffin pan or grease the cups with cooking spray or butter).  When placing the crescent pieces, make sure they cover the bottom and part of the sides.  You are basically creating the bottom cup.

Step 4: Put about a tablespoon of cheese on top of the crescent pieces in the cup.

Step 5:  Place about a teaspoon of sauce on top of the cheese you just placed in the cup. (If you want to add any pre-cooked meat or vegetables to your pizza muffin, do that here as well)

Step 6: Place one additional tablespoon of cheese over your sauce (and meat and/or vegetables if you added them).  Having the cheese on both sides helps adhere the dough from your crescent pieces in place.

Step 7: Finally, top your muffin by placing the remaining pieces of cut up crescent from one triangle on the cheese you just placed in your muffin cup.

Step 8: Repeat this until you have made 8 pizza muffin cups with crescent pieces, cheese, and sauce.

Step 9: Melt your tablespoon of butter and lightly brush it over the tops of your muffins.  You can add a sprinkle of parmesan cheese, garlic powder, or other desired seasonings at this time if you would like.
Step 10: Bake for 30 minutes.

Pizza muffin

Pizza Muffin Pizza Muffin

Now, you have a super tasty pizza muffin that is fun for parties, kids, or the kid in you 🙂


Chocolate Pretzel Buttons

Ever since the first bite of a chocolate covered pretzel, I have been in love!  These simple, yet nice looking chocolate covered pretzels are actually fairly quick and easy to make.  They also, are very versatile.  By buying themed M&Ms for whichever holiday it may be, or by going to their website and making special ones with your initials, baby’s name etc, you can personalize these treats for any event.

Cherry Thumbprint cookies and Chocolate Pretzel Buttons

Cherry Thumbprint cookies and Chocolate Pretzel Buttons

Ingredients:

2 bags of Hershey’s Hugs

1 bag of Snyder’s of Hanover Pretzels,  Butter snap

1 large bag of M&Ms Milk Chocolate Candy’s


  1. Turn oven to 200 degrees.
  2. Cover a baking sheet or cookie sheet in parchment paper.
  3. Unwrap all the Hershey’s Hugs and set them aside in a bowl.
  4. Lay out the pretzels one layer deep over the parchment paper on the baking sheet.
  5. Place a hug in the center of each pretzel.

    Hugs on Pretzels

    Hugs on Pretzels

  6. Place baking sheet with the pretzels and hugs into the oven for about 5 minutes.  You just want to melt the chocolate enough without them oozing all over.  You will see the hugs looking shiny and just starting to lose shape.  This is when you want to pull them out of the oven.
  7. Immediately after removing the pretzels and hugs from the oven, you want to carefully press an M&M into the center of each hug.  This is the most time consuming part and where you need to be most careful.
  8. Let your buttons cool for 15-20 minutes and then you can enjoy a fun snack!

    Chocolate Pretzel Buttons

    Chocolate Pretzel Buttons

Recipe Review – Star Anise Cookies in “The Illustrated Cook’s Book of Ingredients.”

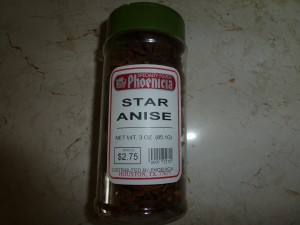
I have long been fascinated with the spice called “Star Anise.” It is used primarily in Asian cuisine but also in Malay, Indian, Pakistani, and Vietnamese. It is a recent newcomer to the West with a flavor like that of Anise, although they are unrelated plants.

Star Anise

Recently having purchased some Star Anise I have been looking for a dish I could use it in. Today, while browsing through a new book, I was reading the section about Star Anise and it had a recipe for cookies made with this spice. The recipe is simple and so I could not resist.

Illustrated Cook's Book of Ingredients

The recipe is from the book “The Illustrated Cook’s Book of Ingredients” which was given to me as a gift.

I liked the results and so am sharing them with you here. Two things however, I will change with the next batch I make will be to reduce the baking temperature to 350 degrees because the cookies baked a little bit too much even with checking and rotating at 5 minutes and taking them out at 10.  I will also increase the amount of Star Anise in the dish because I find this amount providing too subtle a flavor. I would like to taste more of the Star Anise flavoring in the cookie.

Here is the recipe:

STAR ANISE COOKIES

Ingredients
8 Star Anise Seeds

1 c Self Rising Flour*
1 t Baking Powder
1/4 c Brown Sugar

4 T Honey
7 T Butter, melted

Instructions
Preheat oven to 375 degrees.

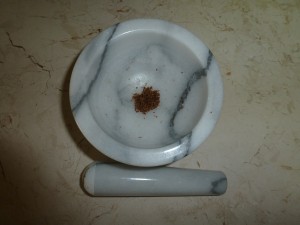
Star Anise ready for grinding

Remove seeds from pods and finely grind in a spice grinder or with a mortar and pestle.

Star Anise seeds

Combine flour, baking powder, and brown sugar with ground Star Anise seeds. Stir in the honey and then the butter. Mix well until smooth.

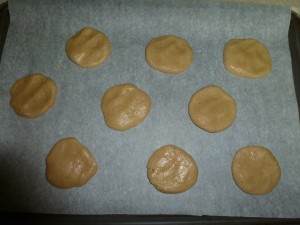
Lightly grease a baking sheet (or two) or line with parchment paper. Drop cookie dough by teaspoonfuls onto the baking sheet, lightly pressing with your hand keeping 2 inches between to allow for spreading.

Star Anise Cookies ready for baking

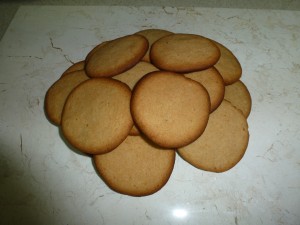
Bake for 10-15 minutes, or until just beginning to turn golden. The cookies may still be a little soft when they come out of the oven, but will become crisper as they cool.

Star Anise Cookies

These are good served with a glass of dessert wine.

* I did not have self-rising flour on hand so I substituted with 1 c flour, 1 1/2 t Baking Powder, and 1/2 t Salt.

Crescent Roll Crust – Asparagus and Ham Quiche

I wanted to prepare quiche for breakfast but was looking for a lighter alternative for the crust since most quiche recipes call for a standard pie crust. Standard pie crusts are made with a lot of fat and tend to be somewhat heavy and have a flaky, crumbly texture.

I considered using puff pastry, but it is very high in fat and would not have provided the texture of the crust I had in mind. Another possibility I considered was phyllo dough, but that would have resulted in a crispy flaky crust. Plus, although phyllo dough itself is low in fat, in order to achieve the layers it is necessary to brush between each, usually with either melted butter or olive oil.

A friend (who not so coincidentally loves them) suggested using crescent rolls for the crust. Unaware of any other examples of using crescent rolls as crust for a quiche, I decide to try an experiment and use them.

Here are the results.

Crescent Roll Crust Asparagus and Ham Quiche

CRESCENT ROLL CRUST – ASPARAGUS AND HAM QUICHE

Ingredients
5 Crescent Rolls (I used low fat)

1 T Butter
8 Asparagus Spears, fresh
¼ Ham cubed
2 T Jalapeno pickled, chopped canned
1 c Spinach leaves, fresh chopped

4 Eggs
1 c Cream, heavy whipping
½ t Pepper

Smoked Gouda

Instructions
Open the package of crescent rolls. Lay out 5 of them into a 9 inch pie pan starting around the top edge and pressing the dough until it forms a complete crust.

Bake crescent roll pie crust in 350 degree oven for 10 minutes.

Trim off the fibrous end of the asparagus spears and cut into 1/2 inch segments. Saute in butter until soft, add cubed ham and cook until lightly browned. Heat jalapeno pieces with asparagus and ham then place in baked pie crust.

Whip eggs with cream and pepper then pour over asparagus, ham, and jalapenos.

Thinly slice smoked gouda and lay over the top totally covering the quiche.

Bake Quiche in a 425 degree oven for 30 minutes, or until jiggling the pan indicates the middle is firm. The cheese will also start to brown.

This recipe resulted in a very creamy quiche with a perfect crust. I will definitely make this again.

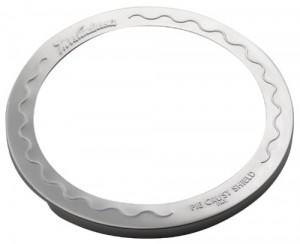
Pie Crust Shield

NOTE: You will need to either use a collar of aluminum foil or a pie crust shield to prevent the crust from burning while the quiche is baking. I got my pie crust shield for a reasonable price at Bed, Bath and Beyond. Check after 15 minutes of baking and if the crust edge is browning cover with foil or pie crust shield for the remainder of the time in the oven.

BTW – I baked the remaining 3 crescent rolls on a separate pan while cooking the crust the first time.