Archive / Beef

RSS feed for this section

Beef posts

Grass Fed Beef

There has been enormous discussions about Grass Fed Beef these days, what is it, why do folks like it, and in general what’s different from “regular” beef. Let’s start at the back end of this and work forwards.

Cattle will graze (eat) many things that will help them grow, remain healthy, and ultimately turns into fat/muscle which is what we eat. Much like humans, we need to eat food to live, grow, and stay healthy – not too surprising. Mass produced beef will be fed many unpleasant things, filled with hormones and antibiotics all to get more “yield” from the cattle. Yield is the percentage of meat they get from a cow. Higher yield = higher profits. The unpleasant things can range from pesticide laden fields, corn, grain, and even other animals and animal byproducts. The theory behind grass fed beef is that it’s a healthier way for a cow to eat and grow, but comes at the expense of less fat and as a result higher cost. If you buy bargain beef, $2.99/lbs beef is most surely quite poor quality, the animals are treated incredibly poorly (which is a discussion for another time), fed literally anything that is cheap, and when processed they put whatever meat filler they can to get maximum yield. You’re savings comes at a cost, to the animals and to what you’re eating.

More premium beef is fed grain/corn, or some other full vegetarian diet, no hormones or antibiotics are used to manipulate the animals to create more meat than they naturally would. While taking yet another step in the healthier direction comes grass fed beef. Which is fed a diet exclusively of grass, sometimes referred to as pasture fed. Some of the bargain beef is “grass fed” but not exclusively, so if you want the full grass fed beef experience and benefits you’ll want to find beef that is 100% grass fed and finished, meaning the last few weeks of the cattle’s life it continues to eat a diet of exclusively grass. There is some debate how this affects the final product, some feel finishing with corn is the best of both worlds, but we are focusing on grass fed beef today.

The benefits to you of eating grass fed beef is that it’s not just lower in fat than other methods of feeding cattle, but the fat that is there is much healthier. Which is why grass fed butter is so popular these days as well. But now you’re wondering if it’s worth it, as fat is where the famous beef flavor comes from, this is the same concern I had. Admittedly I put off trying grass fed beef for a long time because of this. I’m an old-school rib-eye guy, so I really like the classic beef flavor. The answer is difficult, but worth exploring. It really depends what is important to you, if healthier options are important then absolutely give it a try, if you’re looking on a small twist on beef give it a try, if you’re simply curious try it, if you are only driven by the price then it’s probably not worth it, if you want a steak with USDA Prime quality marbling grass fed beef is not for you. For me, if I feel like a steak or burger, but want to be healthier and feel better about what I’m eating then it’s a total winner. If I’m looking for that classic beef flavor, I’d probably lean towards a USDA Choice or Prime, or dry aged steak, preferrably corn fed or finished.

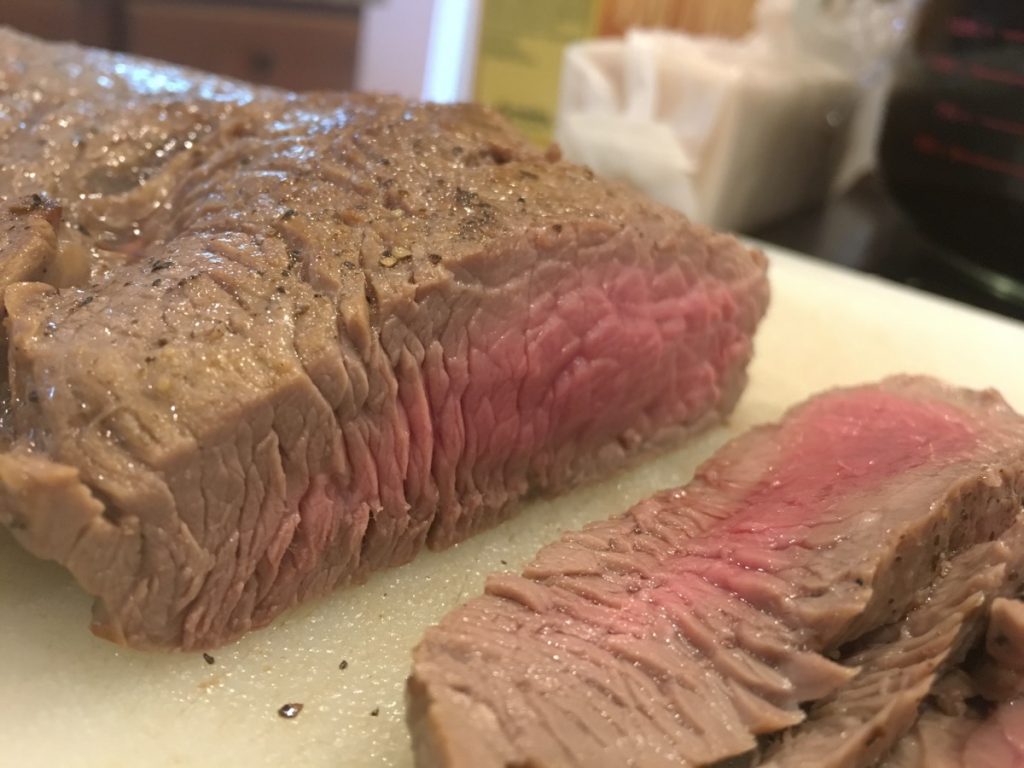
To dispell some of the myths about grass fed beef, it is NOT tough, it is not dry, it does not taste funny, and while cooking is important I feel that’s true of every cut of beef. Below are some pictures of a 100% grass fed top sirloin I made. grass-fed-beef  
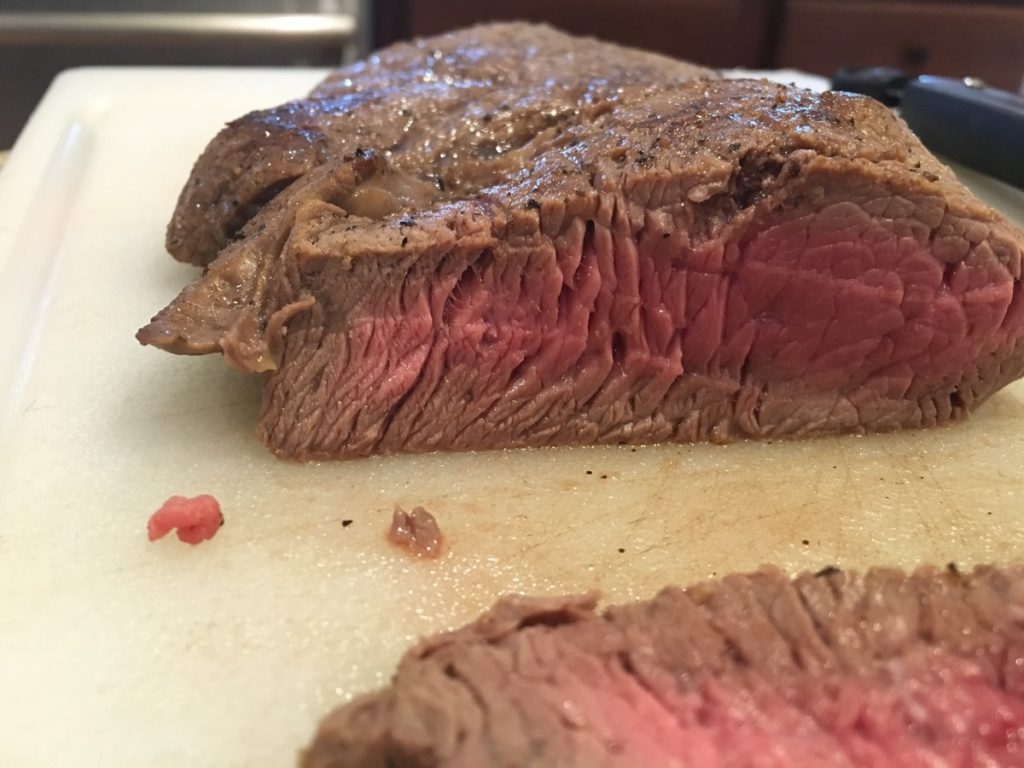
grass-fed-beef-cut

Trying to capture the purest beef flavor I went for a very minimal amount of seasoning.  It was simply seared on a medium-high temperature in a cast iron skillet for about 2-3 minutes per side.  I lightly salt and peppered the room temperature steak just prior to cooking and had a light coating of canola oil in the pan.  After cooking I let it rest for about 10 minutes on a foil tented cutting board.  As you can see this grass fed beef is was extremely tender and juicy.  Top Sirloin is a great universal cut in that it’s not super fatty like a rib-eye, it’s kind of a cross between a filet mignon and a NY Strip, and typically at a much lower price than either!  Even with a leaner cut this steak was melt in your mouth tender, with plenty of natural juices for flavor.

As for the flavor, it really didn’t taste much different than a regular steak, it was maybe a drop leaner, but it still had that classic beef flavor with no off or funny flavors.  I’ve tried several cuts of grass fed beef, and with the exception of a grossly overcooked ribeye (sorry ribeye, that was entirely my fault) they were all as you would expect, a premium tasting steak.  I will warn you, you cannot shop with your eyes like you do for other steaks, this top sirloin looked very boring raw, I wish I snapped a picture!  But the finished product was great.

I highly recommend trying grass fed beef if you haven’t already, with no more attention than you’d show any other cut of beef you can have a healthier option and still satisfy that craving for meat.  With all of that said, if I knew I was going to have one final steak in my life, I’d opt for a USDA Prime, corn finished rib eye, there is a creaminess to the beef from the high fat content that I’ve yet to experience with a grass fed steak.

 

Oster Beef Jerky Kit – Review

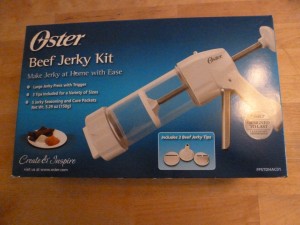
Oster Beef Jerky Kit

For Christmas last year I received several very nice presents from someone close to me who knows how much I love to entertain and prepare foods. One of those presents was an Oster Beef Jerky Kit.

On the box it states this device will allow you to “Make Jerky at Home with Ease.” The kit includes a Large Jerky Press with Trigger, 3 tips for a variety of sizes, and 5 Jerky Seasoning and Cure Packets. I suspect there may have been an ulterior motive with this present since the giver and I go camping together.

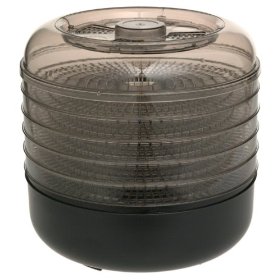
Dehydrator

After borrowing a food dehydrator for the purpose, I finally decided to try my hand at making my own jerky. The instructions were very straightforward and the kit has everything needed to make jerky except for the meat.

An advantage to making jerky using the press is that you use ground meat rather than purchasing whole pieces and slicing them. This makes the process both easier and less expensive plus the seasonings permeate the meat without having to wait for it to marinate.

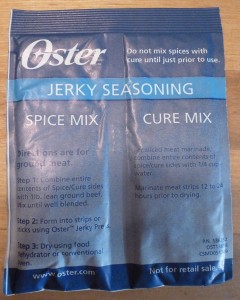
Jerky Seasoning

The process is very straightforward. Simply blend the ground meat with the ingredients in the seasoning packet (spices and cure), load the meat into the press, select the tip you want, and squeeze. The ‘soon to be’ jerky is extruded out the end in the shape you have determined, whether it is narrow or wide strips, or a round stick.

Jerky Press and Tips

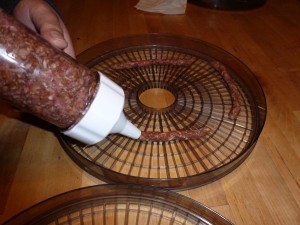
I recommend extruding right onto the dehydrator trays to minimize handling. Making a nicely shaped piece of jerky takes some skill which for me I think may take some time. It requires a steady hand and careful moving of the press as the meat comes out the end.

When the plunger in the press is extended to its farthest point there will still be enough meat in the tip to make more jerky. At this point you can disassemble the press and force it out of the tip manually. Or simply remove the meat from the press, roll or pat it with your hands into the desired shape, and place on the dehydrator tray.

Extruding the Jerky

Stack the trays in the dehydrator, plug it in, and let it do its work. Depending on the dehydrator, the thickness of the meat, and the amount of moisture needing to be extracted, the drying process can take from 4 hours to overnight.

Check the instructions on your dehydrator for the manufacturer’s recommendations and safe food handling information which will vary depending upon which type of ground meat you are using.

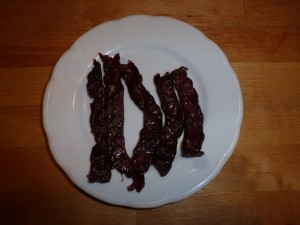
Beef Jerky

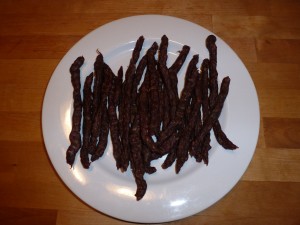
For this jerky I used lean ground beef, although you can use any kind of ground meat. Just make sure you are familiar with safe food handling practices for the kind of meat you are using as some require heating the jerky to a certain temperature even after drying and refrigerating until serving. For the batch of jerky sticks I added 1/2 teaspoon of cayenne pepper to the seasoning to give it an extra ‘kick.’

You don’t have to limit yourself to the seasoning packets available through Oster. After doing some research you can experiment with your own seasoning combinations. However, I can’t stress this enough – make sure you are aware of and observe safe food handling practices for the type of meat you are using.

Spicy Beef Sticks

Buying jerky can be very expensive and making it the conventional way can be difficult, time consuming, and costly. I found using the Oster Beef Jerky Kit for making my own jerky to be easy, quick, and inexpensive. As far as quality in comparison to packaged jerky purchased from the store, I found the jerky made using this method to be comparable.

You might expect jerky made from ground meat to be crumbly and unstable, but this process actually produces jerky of much the same texture as that cut from solid pieces of meat. For anyone who loves to eat jerky, and is willing to put in a little effort to save a significant amount of money, I highly recommend the Oster Beef Jerky Kit. It delivers what it promises by allowing you to  “Make Jerky at Home with Ease.”

Homemade Corned Beef

As I have mentioned before the bulk of my interest in food comes from my parents, this post is one of their traditions that I tried to capture and share with everyone.  This tradition is a something that developed a few years ago and we’ve been doing every year since.  My family really enjoys corned beef, we also noticed that corned beef’s seemed to be of lower quality year after year, they just weren’t how they used to make them.  So we set out to create corned beef’s that reminded us of the corned beef’s of yesterday, but first a little history on the nobel corned beef.

Before we jumped blindly into this project we were curious on the history of corned beef, so we could better understand the tradition and even the scheduling of when and why they were made.  One of the first things we learned is the exact origins of corned beef has been lost, but it is generally agreed that it was done to preserve the meat and make less desirable cuts of beef more tender and flavorful.  A few hundred years ago there were no refrigerators and if you had to travel or survive a winter when your food supply migrated away from you, you had to find a way to survive.  If you’re optimistic and you or your tribe were extremely successful with hunting you’d want to preserve as much of the meat as possible, creating corned beef would be a great way to do this.

The next is the scheduling, why is it that the majority of American’s who eat corned beef eat it in March?  In most of North America March is the end or near end of winter, in order to make corned beef you need to be able to store the meat in a cold temperature for a long period of time.  Even in this day and age not many people have walk in refrigerators in their homes so that means leaving it in a garage or outside.  The main thing to do is keep the meat as close to 45 degrees F as you can for 10-21 days (different recipes call for different lengths of time, some go for much longer than 21 days).  During this time period you need to make sure the meat stays submerged in the brine and it’s generally recommended to give it a stir once a day.

So what is corned beef?  Corned beef is brined beef, typically brisket of beef.  The brining not only adds flavor, but it also tenderizes the meat and changes it’s color.  Brine is in it’s simplest form a pickling liquid which is made from water, salt, sugar and seasonings.  You probably see where this is going now, in order to make corned beef all you do is create the brine, chill it, place the beef in the brine, keep it cool for a few weeks while stirring once a day, ensuring the beef is submerged and then you have corned beef.  The theory is very simple, making all of these items come together in a way that resembles corned beef is a little trickier.

The exact recipe for the brine we use I do not have, Alton Brown has a good basic recipe for you to start with, after that batch you can start tweaking the ingredients to suit your needs.  One of the tricky items to find is Saltpeter, which absolutely must be used when making corned beef.  In addition to adding preservation to the meat it is responsible for the pink hue of the meat which is a staple of corned beef.  The ratio of seasonings, salts and sugar you use varied depending on the size of the batch you’re making.  It seems every year we make a larger and larger batch which is another reason I don’t know our ratio’s.

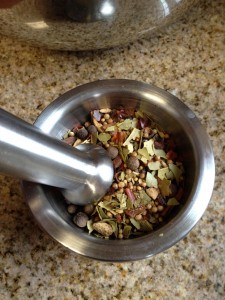
We start by grinding pickling seasoning, along with black peppercorns and other seasonings using a mortar and pestle.

Grinding Pickling Seasoning

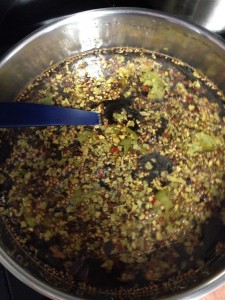
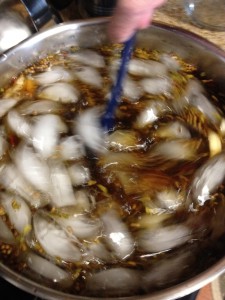
Then we add them to the brining liquid which we are heating on the stove to help aid in dissolving the salts and sugar.

cooking corned beef brine

This is a catch 22 because as soon as everything is dissolved adequately we have to cool it, there is no simple or easy way to cool a lot of water so we just add ice until the temperature is correct.

cooling corned beef brine

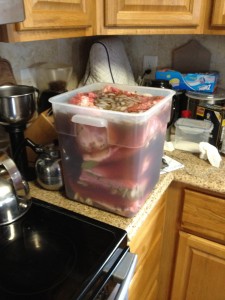
Once the brine is brought down to 45 degrees F we then add it to our brining vessel and the brining of the corned beef’s begins!

corned beef in container to be aged

Now we hurry up and wait 🙁 After several years of testing we’ve found that 3 weeks is the sweet spot for us. I cannot stress the importance of keeping them chilled, if you let the temperature increase even a little bit you run a risk of having bacteria enter the equation and the beef discoloring – which happened to us last year.  The outside of the meat turned gray but the inside was still an inspiring hue of corned beef deliciousness.  We ran into the problem because my family moved from NY to NC and winters down here just aren’t as cold so we had to get a cooler to keep our corned beef’s in with ice around it to keep it the right temperature.

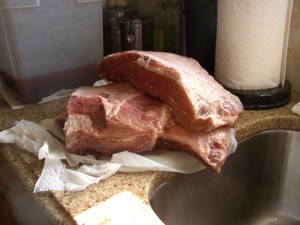
After 3 weeks of daily checks and adding ice approximately every 3 days we are ready!  I present you with fresh, just out of the brine corned beef’s!

finished corned beef

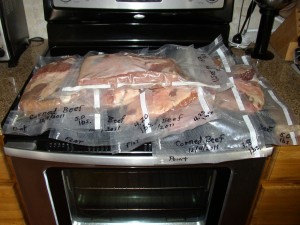
We went a little crazy this year so we ended up using a vacuum sealer and plan on freezing the majority of the corned beef’s this year so we’ll have them throughout the year.  Here is the full harvest on my parents stove.

vacuum packed corned beef

We had our first one about 2 weeks ago now and I think this may have been the best batch to date.  The first year they were a little heavy on the garlic and cloves,  then we adjusted on the second year and they came out very good, last year we ran into the discoloration problem, but this year they are spectacular.

Cooking the corned beef’s is about as simple as it gets, simmer it for 2.5-3 (or longer depending on the size) hours and serve with your favorite corned beef sides!  Some people like to add seasonings such as cloves, carrots or other seasonings or aromatics to the braising liquid, we find ours to be so flavorful it’s just not needed.  Great leftovers, or as corned beef sandwich’s – how ever you like your corned beef this is the only way to go.

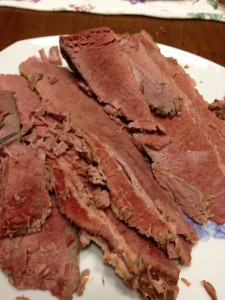
Below is an image of the first corned beef that we cooked – delicious!

cooked corned beef

Labor Day Party – revisited

In my previous post about Labor Day I outlined the plans I had made for the party I was planning for our family, friends, and neighbors. I promised to follow up that post with one letting you know the party results.

For this event I prepared as much in advance as possible. The Onion Dip is something that is good to make in ahead of time so all of the ingredients can blend together which results in a much nicer dish. For chips I provided some favorites from the grocery – tortilla and corn. For salsa I ended up using several of Mrs. Renfro’s: Green, Roasted, and a new one (to me anyway) Pomegranate. The Pomegranate Salsa was excellent and I definitely will get that one again. One of our guests suggested it would be great with Shrimp, and I agree.

The dressings for the Potato Salad and Coleslaw I made the day before to save time as well as improve their flavor. The potatoes I cooked in advanced as well. The actual salads were assembled the day of the party to preserve the crispness of the fresh vegetables.

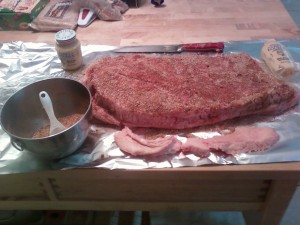
Brisket with Rub

The brisket preparation had to be improvised due to the high winds we were experiencing in Texas over the weekend. My little smoker was not up to the task of performing all night in those conditions, so I ended up smoking the meat for 3 hours then finishing it up in the oven at 170 degrees for the remainder of the time. All told the brisket slow cooked for 20 hours. I had added the rub early in the morning on Sunday so by the time the decision was made to start smoking early it had been on the meat for 10 hours. Per instructions, I gave the meat a light coating of mustard before applying the rub. I used Dijon Mustard.

I ended up not using the mop sauce; it didn’t need it. Instead, before placing the brisket in the oven I wrapped it in foil. I also placed a metal casserole dish in the bottom of the oven filled with water to help keep the meat moist. The brisket actually turned out great, being tender and flavorful with a hint of smoke flavor. Although I would have preferred to smoke it the whole time much of the information I read indicated smoking is generally only effective for the first 5 hours anyway. But that is the subject of some debate.

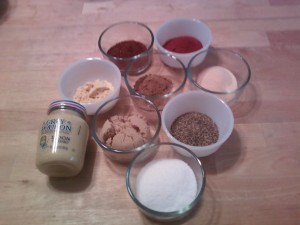
Mise En Place - Brisket Rub

The Coleslaw I prepared is very fresh and I used my own vinaigrette dressing. The Potato Salad was the result of some creativity, ending up with a reddish color (from the Hungarian Paprika) and flavors that go very well with a cookout. It is not heavy on the mayonnaise, but has a definite taste of dill.

The Onion Dip Recipe, how I prepared the Lemonade, as well as a link to the Brisket Rub I used can be found in my previous post. Here are the recipes for my Potato Salad and Coleslaw:

FRESH COLESLAW

Ingredients
2 c Cabbage, green, shredded
1 c Cabbage, red, shredded
1 c Carrots, shredded
½ c Onion, red, chopped
2 Celery stalks, sliced

Dressing
4 T Vinegar, balsamic
2 T Vinegar, red wine
1 T Mustard, Dijon
2 t Sugar, brown
2 Cloves garlic, minced
1 t Celery seeds
½ c Olive oil
½ t Basil, dry
½ t Black pepper
¼ t Salt

Instructions
Prepare dressing in advance. Chop all fresh ingredients and toss together. Serve with dressing either mixed in with the salad, or on the side.

COOKOUT POTATO SALAD

Ingredients
1 ½ t Salt, kosher
½ t Pepper, ground
2 T Sugar
1 T Mustard powder
3 T Dill, dried
2 T Garlic powder
2 T Paprika

1 ½ c Mayonnaise
2 T Mustard, Dijon

1 c Green pepper, chopped
1 c Red pepper, chopped
½ c Onion, red chopped
½ c Celery, chopped
4 Pickles, dill chopped

12 c Potatoes, cubed and cooked

Instructions
Blend dry ingredients then add mayonnaise and mustard to make dressing. This can be made in advanced and kept cool. When ready to make salad, add chopped vegetables to dressing. Cook cubed potatoes until tender. Gently mix dressing and chopped vegetable mixture with cooked potatoes and chill.

For dessert we had Blue Bell Homemade Vanilla and Moolenium Crunch plus all the toppings.

We at Lukewarm Legumes hope you had a very enjoyable and safe Labor Day event with your family, friends, and neighbors. We would be delighted to hear about your Labor Day preparations, your thoughts about our site, and your kitchen experiences. Be sure to +1 us on Google, Like us on Facebook, and Follow Us on Twitter.