Archive / Family

RSS feed for this section

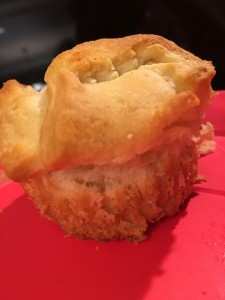
Pizza Muffins

Pizza Muffin

What you’ll need:

One can crescent rolls

2 cups of shredded cheese (I used a mozzarella cheddar blend)

8 oz of spaghetti sauce

One TB butter

one non-stick muffin pan

Servings 4 (2 pizza muffins per person)

Pizza Muffin

Step 1:  Heat Oven to 350 degrees.

Step 2: Remove crescent rolls from package and cut each triangle (there are 8 per package) into about 12 pieces.  Each triangle cut up will make one muffin.  Set these aside.

Step 3: Time to start assembling your muffin.  Put about six pieces (half) of your cutup crescent triangle into one of your muffin cups.  (Don’t do what I did and use paper muffin liners.  Even though crescent rolls are very buttery, they will still partially stick to the liners. Use a non-stick muffin pan or grease the cups with cooking spray or butter).  When placing the crescent pieces, make sure they cover the bottom and part of the sides.  You are basically creating the bottom cup.

Step 4: Put about a tablespoon of cheese on top of the crescent pieces in the cup.

Step 5:  Place about a teaspoon of sauce on top of the cheese you just placed in the cup. (If you want to add any pre-cooked meat or vegetables to your pizza muffin, do that here as well)

Step 6: Place one additional tablespoon of cheese over your sauce (and meat and/or vegetables if you added them).  Having the cheese on both sides helps adhere the dough from your crescent pieces in place.

Step 7: Finally, top your muffin by placing the remaining pieces of cut up crescent from one triangle on the cheese you just placed in your muffin cup.

Step 8: Repeat this until you have made 8 pizza muffin cups with crescent pieces, cheese, and sauce.

Step 9: Melt your tablespoon of butter and lightly brush it over the tops of your muffins.  You can add a sprinkle of parmesan cheese, garlic powder, or other desired seasonings at this time if you would like.
Step 10: Bake for 30 minutes.

Pizza muffin

Pizza Muffin Pizza Muffin

Now, you have a super tasty pizza muffin that is fun for parties, kids, or the kid in you 🙂


Chocolate Pretzel Buttons

Ever since the first bite of a chocolate covered pretzel, I have been in love!  These simple, yet nice looking chocolate covered pretzels are actually fairly quick and easy to make.  They also, are very versatile.  By buying themed M&Ms for whichever holiday it may be, or by going to their website and making special ones with your initials, baby’s name etc, you can personalize these treats for any event.

Cherry Thumbprint cookies and Chocolate Pretzel Buttons

Cherry Thumbprint cookies and Chocolate Pretzel Buttons

Ingredients:

2 bags of Hershey’s Hugs

1 bag of Snyder’s of Hanover Pretzels,  Butter snap

1 large bag of M&Ms Milk Chocolate Candy’s


  1. Turn oven to 200 degrees.
  2. Cover a baking sheet or cookie sheet in parchment paper.
  3. Unwrap all the Hershey’s Hugs and set them aside in a bowl.
  4. Lay out the pretzels one layer deep over the parchment paper on the baking sheet.
  5. Place a hug in the center of each pretzel.

    Hugs on Pretzels

    Hugs on Pretzels

  6. Place baking sheet with the pretzels and hugs into the oven for about 5 minutes.  You just want to melt the chocolate enough without them oozing all over.  You will see the hugs looking shiny and just starting to lose shape.  This is when you want to pull them out of the oven.
  7. Immediately after removing the pretzels and hugs from the oven, you want to carefully press an M&M into the center of each hug.  This is the most time consuming part and where you need to be most careful.
  8. Let your buttons cool for 15-20 minutes and then you can enjoy a fun snack!

    Chocolate Pretzel Buttons

    Chocolate Pretzel Buttons

My Favorite kitchen items

Every year there is always someone on your gift list that you may not know exactly what to get.  With fourteen days left until Christmas, I thought I would run down a quick list of items that I love using in the kitchen that may make your gift giving search a little bit easier.

  1. AirBake Cookie Sheets:  These are the best cookie sheets I have ever purchased.  They are reasonably priced, but a little more expensive than cheap cookie sheets.  They work like a dream, and I have yet to have any problems with them.  I bought these about two years ago and they still look as new as the day I bought them.  The cookies always come out evenly cooked, and I cannot sing enough praises to these amazing cookie sheets.  If you or someone on your gift list is looking for cookie sheets, you cannot go wrong with these AirBake cookie sheets.
  2. Calphalon Contemporary Stainless 13 Piece Set: My husband got me into these pans.  They are a nice set.  It is middle of the line with cost,  but fantastic to cook with.  There is a learning curve for cooking with stainless pans.  They are harder to cook with if you aren’t used to them.  They are not non-stick, but if you heat the sauté pans before adding what you are cooking, you can avoid problems with sticking.  You also need to use butter, oil, etc as a non-stick lubricant.  My husband and I purchased these pans because they work with induction.  We recently purchased an induction cooktop, and if you are in the market for a new cooktop, you should seriously look into one. I’ll have to see about my husband writing up a post about our induction cooktop!
  3. Lodge Preseasoned Cast Iron Skillet:  In addition to the stainless pans, I like to use cast iron pans.  I have a few sizes of the Lodge Preseasoned pans, and they all work wonderfully.  They cook evenly, the food always has a nice flavor, and these work well for both an induction cooktop, as well as your traditional cooktop, and camping!  They are easy to clean, and they are also very affordable.  The only cons is that they can get fairly heavy, especially the larger pans, and the handle gets fairly hot as well.  You will need a potholder or a special hot handle while picking up a hot cast iron pan.
  4. Lodge Silicone Hot Handle Holder and Lodge scrapper: The Lodge hot handle is perfect for medium and larger cast iron pans.  The small cast iron pan handles tend to be too small for these holders, but you could use a pot holder when holding those pans.  I leave my silicone holders on my pans without any problems.  I bought enough to keep them directly on the handles and this way I don’t even have to worry about finding them.  They are made to withstand the hot temperatures, and really do work wonderfully.  Sometimes with a pot holder, you can still feel the heat coming through.  I have not had that problem using these holders.  Now, the scrapper is what I use when cleaning my cast iron pans.  These work great to get off any debris that may have stuck to the pan while cooking.  It is such a simple device, basically a chunk of plastic with a tapered edge, but it does its job very well.
  5. Zipzicle Zip Top Ice Pop Pouch:  These pouches are wonderful for making homemade popsicles.  I would advise you to keep them upright as they freeze.  Once they are frozen, you can lay them on their side.  When you are ready to eat one, I run them under the tap water for just a second at the zip top.  This makes opening them easy.  To fill the pouches, I use a Pyrex measuring cup with a pouring spout and a turkey baster.  I use the turkey baster at first, and then when the measuring cup is almost empty, I’ll pour directly from the measuring cup into the pouches.  They are easy to use, and hold quite a bit of liquid.
  6. Zipzicle Neoprene Ice pop sleeves and Kooleez Ice Pop Insulator:  If you enjoy eating ice pops, both the Zipzicle and Kooleez insulator sleeves are wonderful for keeping your hands from freezing while eating your frozen treats.  They are a fun, and fairly inexpensive novelty item that would be perfect as a stocking stuffer for your ice pop king or queen.  We have both at our house and use them frequently.  The Zipzicle holders are wider and shorter, while the Kooleez are longer and skinner.  Both of these can hold the Zipzicle ice pop pouches.  Since the Zipzicle sleeve is wider, it is a little easier to get pops in and out of them, but a lot of the ice pop tends to stick out of the sleeve unless you buy short ice pops.  The Kooleez are stretchy enough to fit the Zipzicle pouches, but they are tighter.  I like both equally, but you may prefer one over the other.
  7. Ice Pop Joy: Organic, Healthy, Fresh, Delicious by Anni Daulter: There are a lot of amazing and inspirational ice pop recipes in this cookbook.  She gives you great ideas to play with, and you can easily go and explore making up your own recipes off of hers.  I sometimes change around the fruits, add difference juices, etc.  However, her book has given me a lot of inspiration on where to begin with making my own ice pops, as well as some combinations that I never really thought of putting together.  These are not your typical ice pop recipes.  She has recipes for tofu, vegetable, fruit, tea pops, and more.  It truly is a great book with a ton of ideas!
  8. Burn- FIX and First Aid Kit:  It is always a good idea to keep burn aids and a first aid kit around.  Accidents happen to the best of us, and you always want to be prepared.  These burn pads are fantastic for burns, we got them for my husband after he got a bad burn in the kitchen after Thanksgiving.  I wish we had found these when I burned my hand on the oven rack by accident a few months ago.
  9. Infantino Squeeze Pouch, Infantino Squeeze Station, Infantino Fresh Squeezed Simple Squeeze Kit:  If you, your child, or someone you know loves fruit and veggie pouches, Infantino has a great line of products.  The Squeeze Station is nice for when you want to make a more than one or two pouches at once, or you can use the Fresh Squeeze Simple Squeeze when you are wanting to make a single pouch quickly.  They sell pouches that come with twist tops.  I have never had a problem with leaking and they are very easy to use.  It is an easy way to make healthy snacks when on the go for kids and adults alike.
  10. Spiralizer:  I absolutely love my spiralizer.  I have used it to make zucchini noodles, fried zucchini chips, sweet potato chips, potato slices and more.  There are a lot of things you can do with this.  I would suggest you also check out the cook book Inspiralized by Ali Maffucci.  There are some great recipe suggestions, and inspirations to give you some great ideas on how to use your spiralizer and replace some of your carbs with vegetables.  Personally, this is why I bought the spiralizer, to incorporate more vegetables in place of and sometimes with pasta.
  11. Munchie Mug Snack Cup:  These are great for kids and adults alike.  They come in 12 oz or 16 oz sizes.  You take your dry snack of choice (crackers, pretzels, sweedish fish) and place it in the cup.  There is a lid with an overlapping fabric that is easy to put your hand through to get to your food, but keeps the food nice and tidy in the cup when tipped over or dropped, or a solid lid if you want something a little more sturdy or for safe storing, and makes it so you can hold liquids without leaking.  The trick to making sure they don’t leak is to make sure the cap and container are not wet where the cap threads on.  If the threading gets wet, I have had leaks.  However, these cups are mainly advertised for dry foods.  These cups come in a variety of colors as well.
  12. Ninja Master Prep: This is really an amazing blender.  When my blender finally burned out, I researched blenders for a while.  I really didn’t want to spend a ton of money, but I wanted something that worked well.  This blender is absolutely amazing.  I use it to make smoothies all of the time, as well for blending sweet potatoes, mashed potatoes, and it purees like a dream.  It is a pulsing blender.  You push the button on the motor on and off as many times as you need to to get the desired consistency.  The motor is in the top.  It is small and easy to store, which is an added bonus to me since I hate to have too many things on my counters.  Also, you can buy additional attachments and parts from Ninja’s website if you wanted additional jars, lids, etc.  I use this almost every day.
  13. Thermos Hydration Bottle:  This is the best water bottle I have ever had.  It does not leak, it holds a good amount of water, it has a ring so you can attach it with a carabiner and carry it with you.  It fits in a car cup holder as well.  I also love that it doesn’t have a straw.  I love water and I tend to guzzle water when I am drinking it.  To me, a straw gets in the way and makes it take longer to drink the amount of water I’m wanting.  The mechanism to open the water bottle is very easy to open as well as close.  You press the button and it pops open, and push the top down to close it.
  14. Curious Chef Apple Slicer:  I have been thinking about getting an apple slicer for years.  I never made the jump to do it until a couple of months ago.  I must say, I absolutely love the Curious Chef Apple Slicer.  I like to peel my apples, and then use the slicer to remove the core and slice the apple all at once.  It takes less than a second and works very well.  This is actually a product line that is marketed towards getting kids more involved in the kitchen.  You should check them out!


So, there you go!  My fourteen favorite kitchen items for 2015 fourteen days before Christmas!  I hope you were able to find something that you or someone you know will enjoy as well!

How We Feed America…

As we get into the thick of the holiday season, it is our hope that every person is able to have the food they need and are able to enjoy the festivities that many of us look forward to all year round.  However, the sad truth is, that there are millions of families across America who are unable to afford the food they need to prepare and enjoy healthy holiday meals. In fact, this time of the year is a painful reminder of what they wish they could have, but don’t.  However, it doesn’t have to be that way and you can help!  FeedingAmerica invites us all to engage with them for the month of December through participation in #GivingTuesday, #WhyIFeedAmerica, and/or Feed New Traditions.

On Tuesday, December 1, Feeding America recognizes #GivingTuesday—a global day dedicated to giving back. #GivingTuesday kicks off the charitable giving season and is observed on the Tuesday after Thanksgiving Day, Black Friday , and Cyber Monday. Did you know, with as little as $1, you can help Feeding America secure and distribute 11 meals to people facing hunger?  Pretty amazing!  What a wonderful way to not only spend your $1, but also a wonderful opportunity to help others during the season of giving.

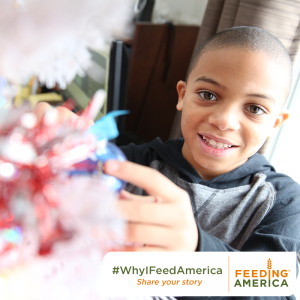
WhyIFeedAmerica_National_Template_SeedLockup

Are things tight for you this holiday season, but still want to help?  You can help out at your local food banks by volunteering your time.  While you are at it, encourage others to help by participating in #WhyIFeedAmerica.  #WhyIFeedAmerica is an opportunity to share your intention and reflect on why it is important to give back and support Feeding America.  Maybe you know someone who has been an inspiration, that you met who is or has battled with not being able to afford food for themselves or their family.  Sharing these stories helps get the message out and the awareness of real issues in our country surrounding hunger.   I am thankful that I always have been able to have food on my table, growing up, and now as an adult.  The fact that this isn’t the case for so many, is not only heartbreaking, but you wouldn’t think it would be as prominent as it is in a developed nation such as ours.  Shouldn’t every American be able to afford the food they need?

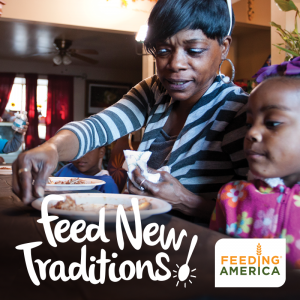
FEAM_HOL_NATIONAL_2
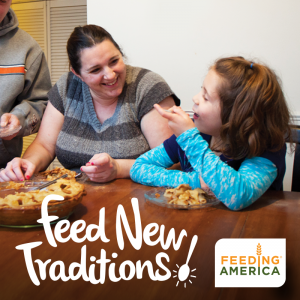
Lastly, take the time to participate in Feeding America’s Feed New Traditions this holiday season.  Feed New Traditions is a content series built to share stories about the people FeedingAmerica serves, and to show you, their volunteers and donors, the impact that you have. With all of our testimonials from #WhyIFeedAmerica and experiences about why this issue is so important, we will be able to inspire more people to help one another in need to have the means to celebrate new traditions this holiday season.

FEAM_HOL_NATIONAL

So, whether you choose to donate or volunteer, by bringing attention to hunger you can make a new tradition with your own family by supporting hunger relief this holiday. We hope you are encouraged to contribute to Feeding America’s efforts, and enabling more families access to the food they need to enjoy a happy holiday season.