Archive / Recipes

RSS feed for this section

All posts that contain a recipe

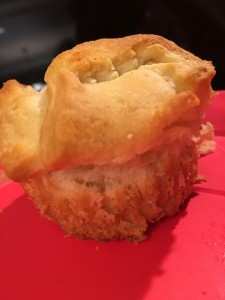
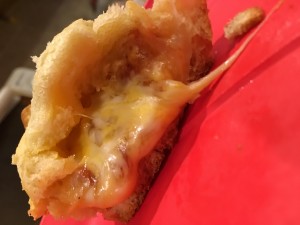
Pizza Muffins

Pizza Muffin

What you’ll need:

One can crescent rolls

2 cups of shredded cheese (I used a mozzarella cheddar blend)

8 oz of spaghetti sauce

One TB butter

one non-stick muffin pan

Servings 4 (2 pizza muffins per person)
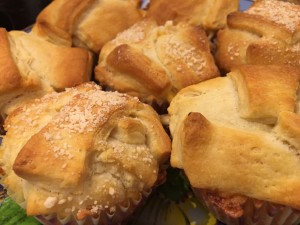
Pizza Muffin

Step 1:  Heat Oven to 350 degrees.

Step 2: Remove crescent rolls from package and cut each triangle (there are 8 per package) into about 12 pieces.  Each triangle cut up will make one muffin.  Set these aside.

Step 3: Time to start assembling your muffin.  Put about six pieces (half) of your cutup crescent triangle into one of your muffin cups.  (Don’t do what I did and use paper muffin liners.  Even though crescent rolls are very buttery, they will still partially stick to the liners. Use a non-stick muffin pan or grease the cups with cooking spray or butter).  When placing the crescent pieces, make sure they cover the bottom and part of the sides.  You are basically creating the bottom cup.

Step 4: Put about a tablespoon of cheese on top of the crescent pieces in the cup.

Step 5:  Place about a teaspoon of sauce on top of the cheese you just placed in the cup. (If you want to add any pre-cooked meat or vegetables to your pizza muffin, do that here as well)

Step 6: Place one additional tablespoon of cheese over your sauce (and meat and/or vegetables if you added them).  Having the cheese on both sides helps adhere the dough from your crescent pieces in place.

Step 7: Finally, top your muffin by placing the remaining pieces of cut up crescent from one triangle on the cheese you just placed in your muffin cup.

Step 8: Repeat this until you have made 8 pizza muffin cups with crescent pieces, cheese, and sauce.

Step 9: Melt your tablespoon of butter and lightly brush it over the tops of your muffins.  You can add a sprinkle of parmesan cheese, garlic powder, or other desired seasonings at this time if you would like.
Step 10: Bake for 30 minutes.

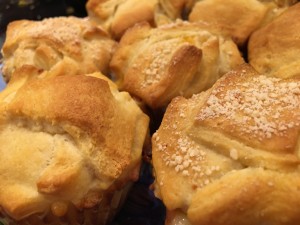
Pizza muffin

Pizza Muffin Pizza Muffin

Now, you have a super tasty pizza muffin that is fun for parties, kids, or the kid in you 🙂


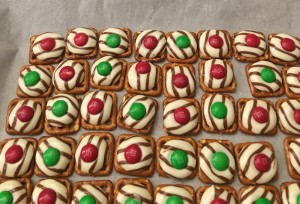
Chocolate Pretzel Buttons

Ever since the first bite of a chocolate covered pretzel, I have been in love!  These simple, yet nice looking chocolate covered pretzels are actually fairly quick and easy to make.  They also, are very versatile.  By buying themed M&Ms for whichever holiday it may be, or by going to their website and making special ones with your initials, baby’s name etc, you can personalize these treats for any event.

Cherry Thumbprint cookies and Chocolate Pretzel Buttons

Cherry Thumbprint cookies and Chocolate Pretzel Buttons

Ingredients:

2 bags of Hershey’s Hugs

1 bag of Snyder’s of Hanover Pretzels,  Butter snap

1 large bag of M&Ms Milk Chocolate Candy’s


  1. Turn oven to 200 degrees.
  2. Cover a baking sheet or cookie sheet in parchment paper.
  3. Unwrap all the Hershey’s Hugs and set them aside in a bowl.
  4. Lay out the pretzels one layer deep over the parchment paper on the baking sheet.
  5. Place a hug in the center of each pretzel.

    Hugs on Pretzels

    Hugs on Pretzels

  6. Place baking sheet with the pretzels and hugs into the oven for about 5 minutes.  You just want to melt the chocolate enough without them oozing all over.  You will see the hugs looking shiny and just starting to lose shape.  This is when you want to pull them out of the oven.
  7. Immediately after removing the pretzels and hugs from the oven, you want to carefully press an M&M into the center of each hug.  This is the most time consuming part and where you need to be most careful.
  8. Let your buttons cool for 15-20 minutes and then you can enjoy a fun snack!

    Chocolate Pretzel Buttons

    Chocolate Pretzel Buttons

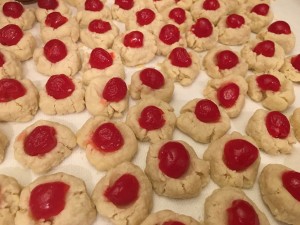
The Best Cherry Thumbprint Cookies

Okay, so I may be a little partial, but these cookies came from my grandma’s kitchen, who I believe got them from her mom and so on.  They only use 5 ingredients and are absolutely amazing!

Cherry Thumbprint Cookies

Cherry Thumbprint Cookies

Note: the ratio of butter to dry ingredients is crucial to having them turn out right.  Make sure the butter is room temperature before starting, and measure accurately.

Ingredients:

1 Cup butter (room temperature – 2 sticks)

1/2 Cup Sugar

1 tsp Almond Extract

2 1/4 Cup Flour

Approximately 20 – 30 Maraschino Cherries (halved)


  1. Heat oven to 350 degrees.
  2. In a mixing bowl, cream the butter and sugar.
  3. Add almond extract to the creamed butter and sugar, and blend.
  4. Add half of the flour to the mixture and blend.
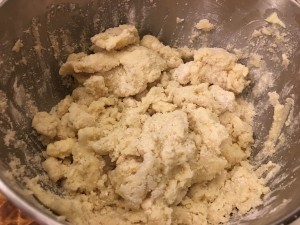
  5. Add in remaining flour and finish mixing. Now, you have completed the dough.

    Dough

    Dough

  6. Measure about a tablespoon of dough and roll into a ball.
  7. Place ball on ungreased cookie sheet about 1 inch apart.  (We love using these cookie sheets Airbake Cookie Sheets)
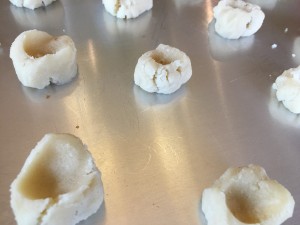
  8. Use your thumb to lightly press an indent into the center of each ball.

    Thumbprint

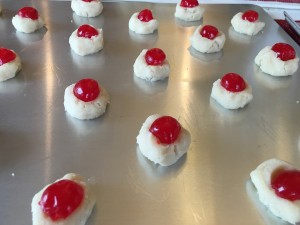
  9. Place cherry into center of each cookie.

    Cherries in cookies

  10. Bake cookies for about 7-10 minutes.  You want the edges starting to turn a light golden color.  The tops of the cookies will still look light.
  11. Enjoy your cookies!
Cherry Thumbprint cookies and Chocolate Pretzel Buttons

Cherry Thumbprint cookies and Chocolate Pretzel Buttons

Check out my next post on how to make these simple, yet nice looking chocolate pretzel buttons!


Tuna Noodle Casserole with Parmesan Base

Ingredients:

2 cups egg noodles

2 cup milk

1 cup heavy cream

1/2 stick butter

2 oz cream cheese

1 cup peas

1 cup parmesan cheese grated

1 can albacore tunafish drained

(Optional: instead of 1 cup peas, you can do 1/2 cup of peas and a 1/2 cup of diced carrots)

Makes two servings.

First off, I have to admit that I had an absolute love for Betty Crocker’s classic tuna noodle growing up.  It was my favorite food that I always got on my birthday, and was easy for me to make myself as a teenager.  Then, after years of this addiction, they changed their recipe.  I was pretty sad about that, and turned to hard copies and virtual copies of tuna noodle recipes to get that same flavor.  However, I quickly realized that practically every recipe I ran into called for cream of chicken or cream of mushroom soup.  This never created the same taste as I remembered my favorite meal having.  Thus, my own version of what I thought a tuna noodle casserole should taste like.  I think the secret is in making an alfredo sauce instead of using the condensed soup route (not that that is a bad thing, but it wasn’t the flavor I was looking for).

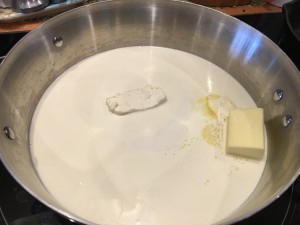
Tuna Noodle Base

Tuna Noodle Base


To start this recipe, we begin with the milk, heavy cream, butter, and cream cheese in a sauce pan.  Bring to almost a light boil while whisking to help dissolve the cream cheese.


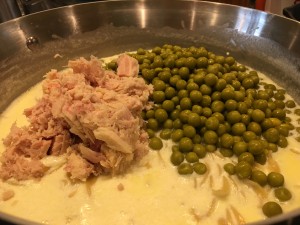
Noodles, peas, and tuna fish

Noodles, peas, and tuna fish


Once the cream cheese is blended and the liquid contents are almost to a boil, add the egg noodles, peas, and tuna fish.  Cook until your noodles are el dente by covering the saucepan with a lid, and turning the heat down to simmer for about 10-15 minutes.


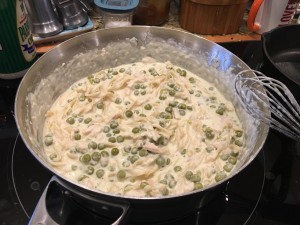
Lastly, remove the saucepan from the heat and add the parmesan cheese.  Use your whisk to mix in the cheese.  It is important to not add the parmesan cheese too early because the cheese will curd instead of being a smooth texture.  You may get tuna fish, noodles, and peas in the whisk while doing this.  That is okay.  You can give your whisk a tap on the side of your saucepan and they will fall right out of your whisk.

image-4

Added in the parmesan

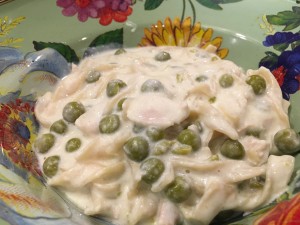
Now, it’s time to enjoy the fruits of your labor.  If you’d like, you can sprinkle a little more parmesan on your portion of tuna noodle casserole before serving.

image-6

Enjoy!


I hope you enjoyed my version of a classical tasting Betty Crocker tuna noodle. 🙂