Archive / Recipes

RSS feed for this section

All posts that contain a recipe

Light and Fluffy Sourdough Bread

For those of you who love the flavor of Sourdough bread, but also prefer a light and fluffy loaf with a thin crispy crust, this is the recipe for you.

Mise En Place - Bread


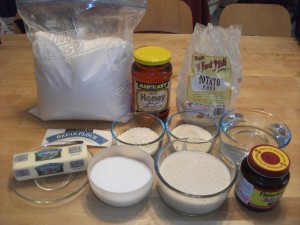
We start with Mise En Place by first carefully reading our recipe instructions and its list of ingredients*. Then we gather all the necessary items and measure them into separate containers.

An essential ingredient which must be prepared ahead of time is the sourdough starter. I am very fortunate to have a friend who several years ago brought me some starter from Germany that had been Sourdough Starter maintained by a German bakery for several hundred years. If you do not have access to sourdough starter, you can either purchase some, or make your own. The purpose of this blog is not to tell you how to make or where to purchase sourdough starter, so I recommend you enter “sourdough starter” in your favorite search engine to locate the resource you need.
Once you have your starter, to maintain it you will need to regularly ‘feed’ your it and store it in the refrigerator.  I keep mine in Mason Jars.

The first step to making this bread it to mix the dry ingredients. Then blend in the butter. Finally add the rest of the ingredients, including the warm water. It is essential to check the water temperature because if it is not warm enough it will not activate the yeasts properly. If it is too hot, it will kill the yeasts.

Very important to making this bread is kneading the dough in order to form the gluten. It is the gluten that enables the sponge to develop the bubbles from the yeast and produces the lighter loaf.

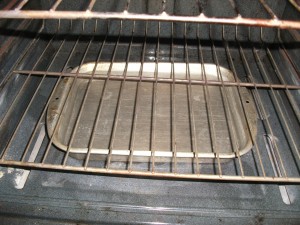
Water Pan

Another technique I use with this bread is to place a pan of water in the bottom of the oven and heat it with the oven before placing the bread in for baking. The purpose of this is to delay the crusting over the top of the loaf to allow the expansion of the dough by the additional activity of the yeast from the oven heat before the dough becomes so hot to deactivate the yeasts.

It is extremely important to take great care in how the dough rises. Extra rising times help to ensure a lighter loaf. Also, after the first rise, when you ‘punch’ down the sponge, do not literally punch it down, be gentle. The purpose of this stage is simply to eliminate any large pockets of air, rearrange the dough so the yeast comes in contact with more ‘food’ to create additional carbon dioxide, and form the loaves in preparation for baking.

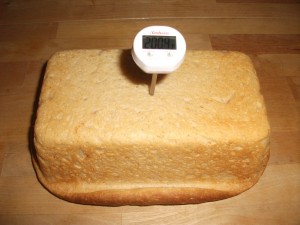
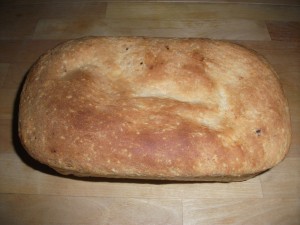
After the second rise, you are ready to bake the bread. Place it in the oven, which should be full of steam from your water pan, and set the timer for 30 minutes. When the timer goes off, rotate the loaves and continue to bake. The bread will be done when the crust has turned a golden color and the internal temperature has reached between 190 and 200 degrees.

Baked Temp Loaf

Loaf 1 Baked

Enjoy!

* Light and Fluffy Sourdough Bread

Ingredients
4 c Flour, bread
½ c Flour, potato
¼ c Milk, dry
2 t Salt, kosher
1 ½ T Yeast, instant

½ c Butter, unsalted butter, softened

1 ½ c Water, warm (105 – 115)
1 c Sourdough starter (room temperature)
2 T Honey

Instructions

In a large bowl combine the flours, dry milk, salt and yeast.

Add the butter and mix with dough hook on low speed.

Then add the honey, warm water and sourdough starter.

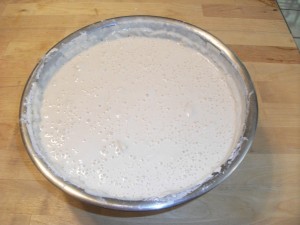
When all the flour is thoroughly moistened either beat on medium or knead by hand for 7 minutes to encourage gluten formation.  The dough should be moist and sticky.

Place in oiled bowl, turning once to coat, cover with plastic and allow to rise for 1 ½ hours.

Pour out sponge on a lightly floured counter; gently rearrange dough, shape and place in bread pans.

Coat with oil, cover and allow to rise another 1 ½ hours.

Preheat the oven to 350 degrees for at least 30 minutes prior to baking.  Have the oven shelf at the lowest level.

Bake for 30 minutes, then turn.  Bake until crust is golden brown and the internal temperature reaches 190 to 200 degrees.

Do not use a baking stone for this bread as the heat retained by the stone will produce a thick hard crust.

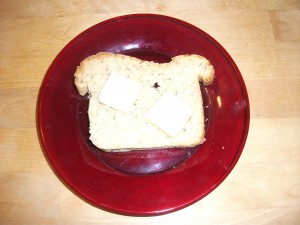
Slice with Butter

Healthy Baked Vegetables

Personally, I am more of a sweets girl than a vegetable fiend, but every once in a while I get this silly notion that I am going to eat healthier.  Especially around the first of the year, I get on this kick that “I am going to look like a super model by summer” and start working out more, along with every other person who wrote this on their New Years Resolution, and I will do this by eating more fruits and vegetables.


Thinking

Hmmmm....

Fruits aren’t usually a problem for me, but unless I am forcing myself to drink my V8 with more meals than breakfast, I am not getting my daily required servings of vegetables.  I’d grab a roll, a piece of chocolate cake, a cookie, or a milkshake first.   Who wants a vegetable when you can have a decadent piece of chocolate? It has antioxidants, right? Better yet, if  it’s chocolate ice cream, it also has calcium.  Yeah, well, I have finally given into the battle won by my waistline, when the world according to Tiffany (chocolate ice cream is healthy) was creeping my scale to new heights and my dreams of looking like Cindy Crawford or Niki Taylor by summer were dreams of 6 months too late.

It was time for operation veggies.  In an effort to getting myself back on track, I found a very simple way of cooking vegetables that was low in calorie, very simple to do, and I actually like them!  They taste great!


All you need are:

Vegetables of choice (I chose some yellow and orange carrots, broccoli, snap peas, and green beans)

Cooking spray (I like to use the store brand, butter flavored cooking spray.  It has zero calories.)

Baking sheet (I used two of them because I had a lot of vegetables I wanted to bake, but how many you need, really depends on how  many vegetables you want.)

Seasoning  (I don’t normally add anything because I like the vegetables baked with the butter flavored cooking spray, but you may prefer to add some salt, pepper, maybe some rosemary, fresh basil, garlic…)

Parmesan Cheese (Sometimes I like to sprinkle a couple of teaspoons on top when I make a bowl of baked vegetables.  It adds some nice flavor.)

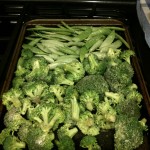
Green Vegetables

Broccoli, Snap Peas, Green Beans

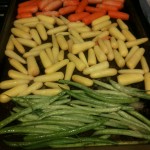
First, you set the oven to 400 degrees.  Second, you clean and prepare your vegetables in slices or dices of your choosing.  I tend to cut the florets from the broccoli, leave the beans and snap peas whole, and peel and slice carrots into 1 inch chunks. In the picture below, you will see that I used the small bags of baby carrots this time.  In that case, I did not need to peel or cut up the carrots.  However, it did take longer because I didn’t.  I would recommend cutting them up a little bit more so they cook quicker.

Green Beans, Carrots

Green Beans, Carrots


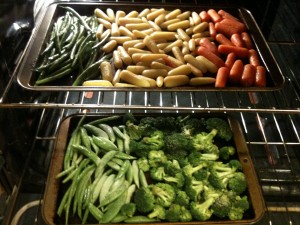
Third (optional step), place the vegetables in a bowl and toss them with the spices of your choosing.  You may want to add a tablespoon of extra virgin olive oil to every 2 cups of vegetables to help blend and adhere the dry spices to your vegetables.  Fourth, you lay out your vegetables on your greased baking sheets, I just spray the pans with cooking spray, then lightly spray the tops of the vegetables with cooking spray as well (you can skip spraying with cooking spray on top if you added the extra virgin olive oil in step three).  Fifth, when the oven is ready, place the baking sheets in the oven for 20 minutes.  At the 10 minute mark, you may want to mix the vegetables around on the pan a little bit, then put them back in the oven for the remaining 10 minutes.


Oven mixed veggies

Off to the oven


~~~~~~~~~~~~~~~~~~~~~~~~~~~~~~~~~~~~~~~~~~~~~~~~~~~~~~~~~~~~~~~~~~~

Tips:

Make sure the vegetables are a single layer on the baking sheets to ensure even cooking.

Frozen vegetables take less time to bake than fresh vegetables.  Some fresh vegetables, such as carrots, take closer to 30 minutes to bake.

The smaller the vegetable and the thinner the vegetable, the quicker the vegetable will cook.

~~~~~~~~~~~~~~~~~~~~~~~~~~~~~~~~~~~~~~~~~~~~~~~~~~~~~~~~~~~~~~~~~~~~

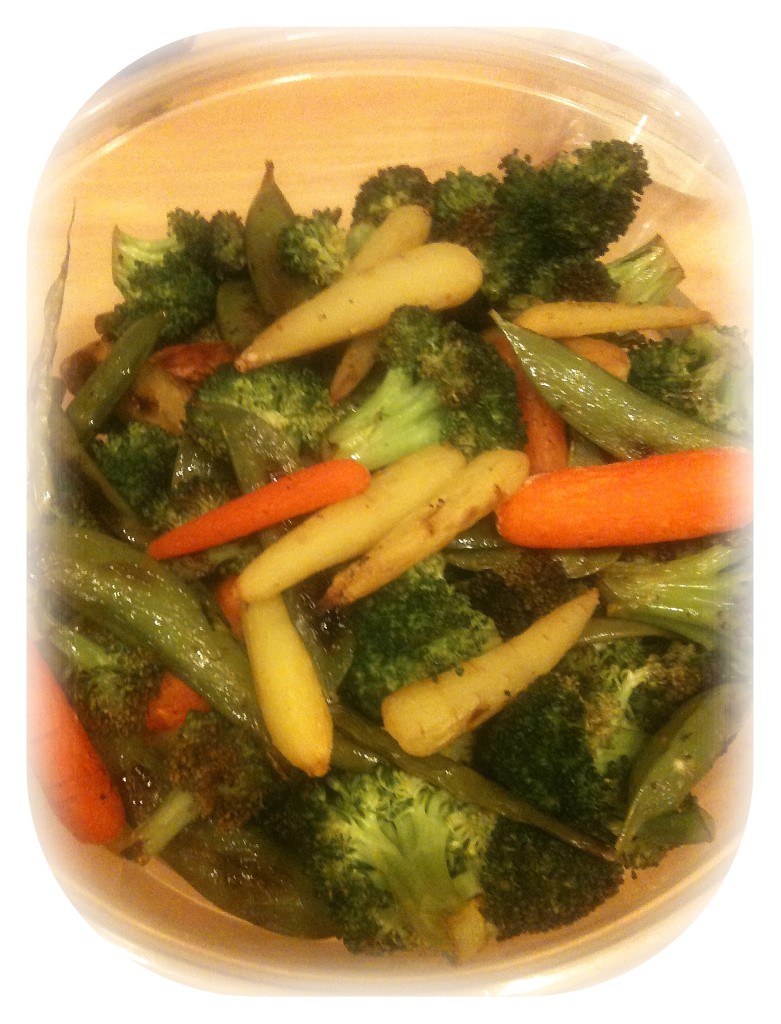
When I make my vegetables this way, I tend to make a ton of them because they make a great snack for later as well.  If I was to add Parmesan cheese, I would add it to the vegetables just before eating and after they have been baked.  I hope you enjoy this quick and healthy recipe.  Bon Appetit!

food veggie pic

Healthy Baked Vegetables


Cream of Tartar – Versatile Kitchen Chemical

CREAM OF TARTAR

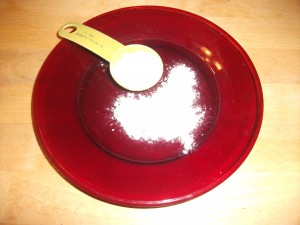
Cream of Tartar - Measure

Cream of Tartar is a very useful and versatile chemical for your kitchen. My hope is that through this article you will gain a greater appreciation of it and how its presence in your kitchen ads value to your efforts and the products you make with it.

ORIGINS

Records of the use of Cream of Tarter extend as far back as 7,000 years.  The Archaeological Instutute of America reported in the September/October 1996 edition of its Journal that “Patrick E. McGovern and a team from the University of Pennsylvania Museum found calcium salt from tartaric acid, which occurs naturally in large amounts only in grapes,” at a Neolithic village site in Iran, indicating that wine was being produced in that region of the world at that early date.  You can read the full article  here.

CHEMISTRY

Cream of Tartar is obtained as a by product of wine manufacture by extracting it from a crystal that is deposited on the inside of wine barrels as the wine ferments. The chemical names for it are: potassium tartrate, potassium hydrogen tartrate, and potassium bitartrate. Its molecular formula is KHC4H5O6.

COOKING
Cream of Tartar has many uses in the kitchen, including:

Baking Powder – Cream of tartar can be used to make baking powder by combing 2 parts Cream of Tartar with 1 part Baking Soda and 1 part Cornstarch.

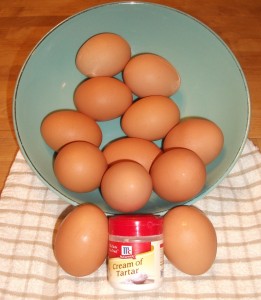
Eggs and Cream of Tartar

Meringue – Cream of Tartar, due to its acidity, can be used to stabilize and add volume to beaten egg whites such as are used in angel food cake, pie meringue and meringue cookies. As egg whites are beaten, they expand in volume.  The beating of the egg whites causes the strands of egg protein to partially unfold and connect with each other. These interconnected strands wrap around air bubbles which leads to foam development. Cream of tartar lowers the pH of egg whites and helps neutralize the tendency of proteins to repel each other; encouraging their connection. This helps support the air bubbles formed by beating. The result is a much more stable foam.

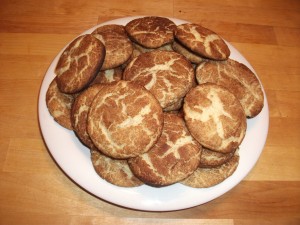
Snickerdoodles

Snickerdoodles – This famous cookie has the characteristics it does because of the use of Cream of Tartar.  See recipe below.*

Icing and Candy – Cream of Tartar is used in icing and candy recipes because it helps produce a product that is smoother and creamier.

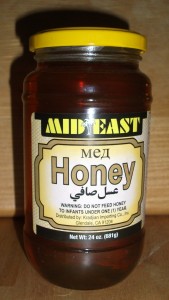
Honey


Syrup – Adding Cream of Tartar helps prevent crystallization of syrup and honey.


Color Preservation in Vegetables – Boiling vegetables causes them to lose their pigmentation and therefore lose much of their visual appeal.  Adding Cream of Tartar to the water helps prevent this. Because of its acidity, Cream of Tartar also helps retard browning of vegetables and cut fruit. However, care must be taken so that the amount of Cream of Tartar used does not affect the flavor of the produce.

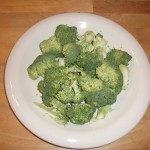
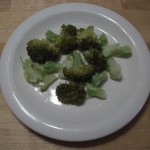
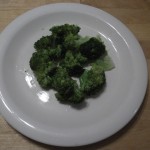
However, I tried an experiment comparing boiling broccoli in a Cream of Tartar solution with my standard steam method. I’ll let you be the judge of which method produces the most appealing results:

Broccoli - Raw

Broccoli - Raw

Broccoli - Boiled

Broccoli - Boiled

Broccoli - Steamed

Broccoli - Steamed


CLEANING

Cream of Tartar can be used to clean your pots and pans as well, particularly aluminum and copper. It can also help take stains out of fabrics such as kitchen towels & aprons, and aid in cleaning your porcelain sink.

TOOTH WHITENING

Although I have not tried it (yet), there are articles about how Cream of Tartar can be used even to whiten teeth. If true, this is of particular help to cooks after years of drinking hot coffee & tea and sipping wine.

PLAY CLAY

Cream of Tartar can be used along with other items from your kitchen to make modeling clay.

1 cup flour
1 cup water
1 cup salt
1 tablespoon vegetable oil
1 tablespoon cream of tartar
3-5 drops of food dye (various colors)

* Snickerdoodles

This recipe comes from the McCormick website.

Ingredients
2 3/4 c Flour, all purpose
2 t Cream of Tartar
1 t Baking Soda

1 1/2 c Sugar, divided
1/2 c Butter, softened
1/2 c Shortening

2 Eggs
2 t Vanilla

1/4 c Sugar
1 T Cinnamon, Ground

Instructions
1. Mix flour, cream of tartar and baking soda in large bowl. Set aside. Beat 1 1/2 cups sugar, butter and shortening in large bowl with electric mixer on medium speed until light and fluffy. Add eggs and vanilla; mix well. Gradually beat in flour mixture on low speed until well mixed. Refrigerate 1 hour.

2. Preheat oven to 400°F. Mix 1/4 cup sugar and cinnamon. Shape dough into 1-inch balls.

Roll in cinnamon sugar mixture to coat. Place 2 inches apart on baking sheets.

3. Bake 9 to 11 minutes or until lightly browned. Cool on baking sheets 1 minute. Remove to wire racks;
cool completely.

——————–

If you are looking for a place to purchase Cream of Tartar in bulk you might want to check Penzey’s

Fluffy Whole Wheat Happy Face Waffles

There is nothing like seeing the smile on your child’s face.  Always popular for breakfast in our home, on the weekends when we’re not so rushed, are waffles and pancakes.  What makes them even better is when they are decorated with fruit sauces, whipped cream, chocolate chips, and *Nutella.  To top it off, something that makes them happy every time, is adding a smiley face.

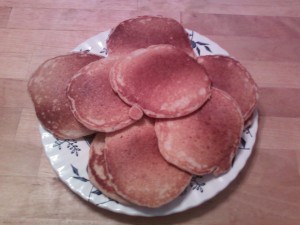
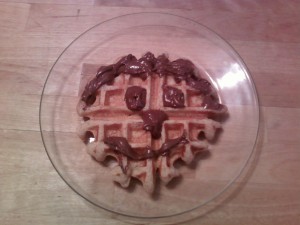
Last weekend I received a request for waffles AND pancakes, topped with a Nutella Happy Face.  To make this creation I used my Fluffy Whole Wheat Waffle recipe (it can also be used to make pancakes.)  Then decorated them with designs made with Nutella.  (As you can see, you don’t have to be a great artist to make them happy.)

Fluffy Whole Wheat Pancakes Fluffy Whole Wheat Happy Face Waffle


Here is my recipe which is designed to produce pancakes and waffles that are very light and fluffy.  I hope you and your family enjoy them as much as we do.

Fluffy Whole Wheat Happy Face Waffles

Ingredients
1 c Flour, Whole wheat
1 c Flour, All purpose
2 t Baking powder
½ t Baking soda
1 t Salt, Kosher
3 T Sugar

3 Eggs, separated
1 c Buttermilk

6 T Butter, unsalted, melted
½ to 1 c Buttermilk

Nutella

Instructions
Mix together dry ingredients. Combine egg yolks and 1 cup buttermilk.

Add egg mixture to dry ingredients. Stir just to combine.

Add melted butter (allow to come to room temperature first) and ½ cup buttermilk (up to 1 cup as necessary to get the batter to the proper consistency).

Beat egg whites until stiff peaks form. Fold gently into batter.

Scoop batter onto greased waffle iron and cook until it stops steaming and the waffles are golden brown.

Draw Happy Face on Waffles using Nutella.

* Just in case you are not familiar with it, Nutella is a versatile sweet spread made from hazelnuts and cocoa.