Archive / Savory

RSS feed for this section

All savory dishes

Bacon Wrapped Shrimp

A few years ago, for our Christmas Eve family gathering, one of my concoctions became a new favorite. It it fairly easy to make, has bacon, shrimp, spicy seasonings, and can be eaten with your fingers – the perfect party food!

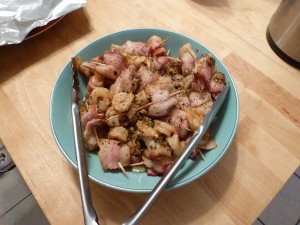
Bacon Wrapped Shrimp - cooked

I wanted to share this recipe with our readers because I am pretty sure that many of you after trying them will begin to include it along with pigs in blankets, onion dip and/or salsa with chips, cookies, brownies…….. Whatever is your holiday tradition.

Both you and your guests will love these.

BACON WRAPPED SHRIMP

Ingredients
2 lb. Shrimp, medium (about 90)
30 slices Bacon, thin
90 Toothpicks, round wooden

2 Limes, zested and juiced
2 T Sesame oil

2 t Salt, Kosher
2 t Pepper, black
2 t Hot red pepper flakes

Instructions
Preheat oven to 425 degrees F.

Cut bacon slices into thirds, making 90 pieces.

If using frozen shrimp, thaw under cool running water. Then peel. If using easy peel shrimp you can easily remove the shell by simply pinching the tail and the shrimp will pop out of the shell. Be careful to remove the entire shell.

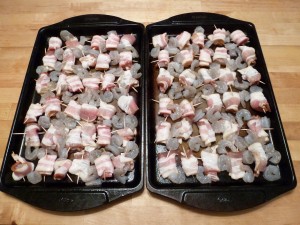
Once the shrimp are peeled, wrap each with one piece of bacon and secure with a toothpick.

Lay wrapped shrimp pieces in one layer on baking sheet.

Combine lime zest, lime juice (no seeds), Sesame Oil, Salt, Pepper, and Red Pepper Flakes.

Bacon Wrapped Shrimp

Brush seasoning mixture over wrapped shrimp, place baking sheet in oven and bake 5 minutes.

Remove from oven, turn, and return to oven for another 5 – 10 minutes, or until shrimp are pink & curled and bacon is cooked. It is very important to not overcook the shrimp.

Place on serving dish and enjoy!

Sriracha Peanuts

It’s the Holiday Season, and although many of us give all throughout the year, it is during this time our focus turns to displaying our love and friendship through the giving of gifts. Not surprisingly, you might say, I like giving gifts from my kitchen; especially ones that not only have sprung from my creativity, but also match the preferences of the recipient of the gift. Giving gifts from my kitchen is, for me, not only a way to express caring; it is a way to give something of myself.

Sriracha Peanuts

I have a friend who LOVES spicy foods. Although I don’t give him gifts throughout the year, during the holidays it has become a tradition for me to give him some of my spicy Sriracha Peanuts. I made these for him first a number of years ago, and he has come to expect them ever since. Not that I’m complaining at all, after all cooks love it when people appreciate their creations.

If you like spicy snacks, you will really like this recipe.

SRIRACHA PEANUTS

Ingredients
1 c Peanuts, raw

½ t Salt, Kosher
½ t Red pepper (Cayenne)
¼ t Garlic powder

2 t Sriracha
1½ t Peanut Oil
1 t Rice Vinegar

Instructions
Preheat your oven to 350°

Spread the Peanuts out on a baking sheet and roast them in the oven for 10 minutes.

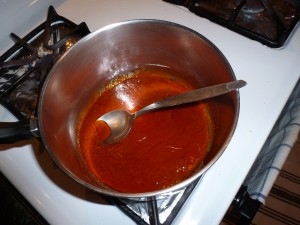
Sriracha Coating

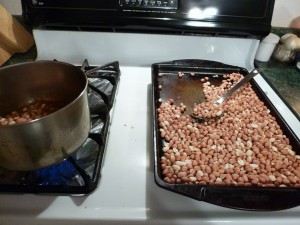
While the peanuts are roasting combine all the other ingredients in a pot and bring to a simmer over medium heat.

Add the roasted peanuts to the pot, stir to coat, then cook for 2 minutes.

Adding Toasted Peanuts to Sriracha Coating

Spread the peanuts out on a baking sheet and bake in oven for 8 minutes.

After 8 minutes check, stir, and bake for another 8 minutes.

Stir again and bake the peanuts for an additional 8, making sure not to let them burn.

When they are done they will have lost their raw, green, peanut scent and produce a nice roasted peanut aroma.

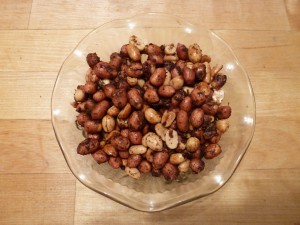
Baked Sriracha Peanuts

Cool completely and enjoy while they last.

Fantastic Breakfast Casserole

Sometimes breakfast is a rushed time of day. When this is the case it can present a number of challenges to the cook especially if they are preparing breakfast in someone else’s kitchen.

I had promised to prepare breakfast for a special occasion at someone else’s home, and wanted to have it ready when I arrived. The challenge was to make a breakfast that would taste great, be hearty, satisfying, and portable, yet not take a lot of time to get ready. So, my idea was to make a one dish recipe that could be made in advance, baked, transported, and ready to serve on arrival.

Breakfast Casserole

The following is the result of a dish prepared in the LukewarmLegumes Test Kitchen that is not only easy to make, but your guests will all be clamoring for seconds. With the holidays upon us and all the visiting, visitors, and meal preparation that goes along with it, this dish just might be what you need. I promise your guests won’t be disappointed.

FANTASTIC BREAKFAST CASSEROLE

Ingredients
1 c Rice, cooked (3 cups)

3 Eggs
½ t Salt
¼ t Pepper
¼ c Cream

2 T Flour
2 T Bacon drippings or butter
1 c Milk

Bunch Green onions, chopped
½ Red Bell pepper, chopped

12 oz. Bacon, cooked and chopped *

3 c Cheddar cheese, grated

Instructions
The base of this dish is a bed of rice. So the first task in preparing it is to cook the rice by taking one cup of rice, adding it to two cups of boiling water, and simmering for 30 minutes.

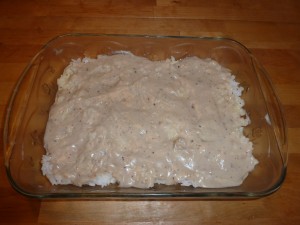
Place the cooked rice in the bottom of a 9 x 13 casserole dish. Mix together the eggs, salt, pepper and cream and pour over the rice. Prepare gravy with the flour, bacon drippings (or butter), and milk and pour over the rice/egg layer.

Egg and Gravy Layer

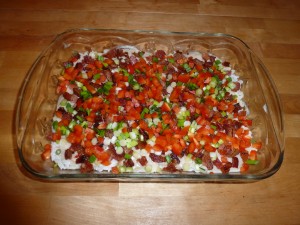
For the next layer sprinkle the chopped green onion and red bell pepper. Then comes the chopped bacon layer.

Veggie and Bacon Layer

Spread the grated cheddar cheese over all.

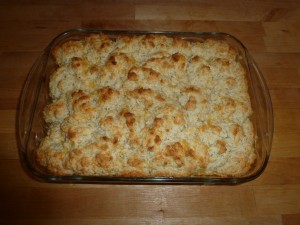
Then prepare the biscuit dough (see recipe below) and spoon over the top.

Biscuit Layer

Baked in an oven preheated to 375 degrees for 30 minutes or until the top is a golden brown and the filling is bubbling.

Here is a list of the layers in order:
• Rice
• Egg mixture
• Gravy
• Veggies
• Bacon
• Grated Cheese
• Biscuits

BISCUITS

Ingredients
2 c Flour
1 T Baking powder
½ t Baking soda
1 t Salt
½ t Garlic powder
1 t Parsley
½ t Pepper

12 T Butter

1 c Buttermilk

1 c Cheddar cheese

Instructions
Combine dry ingredients. Cut in butter. Stir in buttermilk. Mix in cheese. Work the dough only until it is blended.

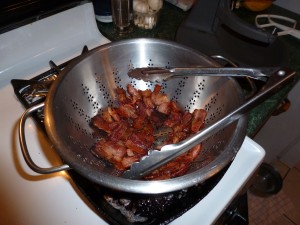
* After cooking the bacon, in order to conserve the bacon drippings for use in your recipe, I recommend using a metal colander and draining over a dish to capture the drippings rather than using paper towels because the paper towels will absorb the juices and make then unusable.

Bacon Draining

Roasted Chickpeas – Creole Style

This year our family has decided to depart from our traditional Thanksgiving Day fare and instead will be replacing our menu with Louisiana style offerings like Gumbo made with Andouille Sausage. Thankfully, pies will still include Southern favorites like Pecan and Buttermilk (my favorites).

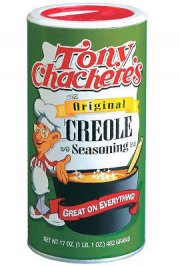
Thinking of items I could contribute that would support the Louisiana theme, and having just recently tried making Roasted Chickpeas, I thought a good snack item to have before the meal would be Roasted Chickpeas Creole Style made with the Tony Chachere’s Creole Seasoning I had picked up a few months ago but never opened.

Tony Chachere's Creole Seasoning

Before serving new dishes to guests I always make a batch beforehand as a test, so I can work out all the ‘kinks’ in the recipe and not subject someone to a dish before it has been perfected.

To make this recipe I took two cups of the cooked, dried chickpeas I had stored in the refrigerator from making the last batch, and tossed them in a mixture of two tablespoons peanut oil and one tablespoon of Tony Chachere’s Creole Seasoning.

I preheated the oven to 425 degrees, spread the chickpeas on an oven pan, and baked in five minute intervals until the became crispy (about twenty minutes). Be careful not to over toast them, which is easy to do and will ruin them.

Here is the recipe:

ROASTED CHICKPEAS – CREOLE STYLE

Ingredients
2 c Chickpeas, cooked and dried*

2 T Peanut oil
1 T Tony Chachere’s Creole Seasoning

Instructions
Toss chickpeas in oil and seasoning mixture. Spread in one layer on baking sheet and bake at 425 degrees until crispy, stirring every five minutes – about fifteen to twenty minutes.

There are several ways this recipe is significantly different than how I made my other chickpea snacks: these are made with Peanut Oil, not Olive Oil. Also, I roasted them at a higher temperature for a shorter period of time (about half).

*For the method how to cook and dry the chickpeas, see my previous blog Roasted Chickpea Snacks.

I had never used, or even tasted, Tony Chachere’s Creole Seasoning before this and after having used it and tasted it I can understand why it is so popular for easily creating dishes with an authentic Creole flavor. However, be careful using it, especially the first time, because it is very salty.