Archive / Test Kitchen

RSS feed for this section

Experiments.

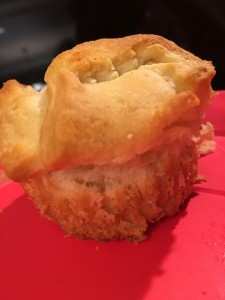
Pizza Muffins

Pizza Muffin

What you’ll need:

One can crescent rolls

2 cups of shredded cheese (I used a mozzarella cheddar blend)

8 oz of spaghetti sauce

One TB butter

one non-stick muffin pan

Servings 4 (2 pizza muffins per person)

Pizza Muffin

Step 1:  Heat Oven to 350 degrees.

Step 2: Remove crescent rolls from package and cut each triangle (there are 8 per package) into about 12 pieces.  Each triangle cut up will make one muffin.  Set these aside.

Step 3: Time to start assembling your muffin.  Put about six pieces (half) of your cutup crescent triangle into one of your muffin cups.  (Don’t do what I did and use paper muffin liners.  Even though crescent rolls are very buttery, they will still partially stick to the liners. Use a non-stick muffin pan or grease the cups with cooking spray or butter).  When placing the crescent pieces, make sure they cover the bottom and part of the sides.  You are basically creating the bottom cup.

Step 4: Put about a tablespoon of cheese on top of the crescent pieces in the cup.

Step 5:  Place about a teaspoon of sauce on top of the cheese you just placed in the cup. (If you want to add any pre-cooked meat or vegetables to your pizza muffin, do that here as well)

Step 6: Place one additional tablespoon of cheese over your sauce (and meat and/or vegetables if you added them).  Having the cheese on both sides helps adhere the dough from your crescent pieces in place.

Step 7: Finally, top your muffin by placing the remaining pieces of cut up crescent from one triangle on the cheese you just placed in your muffin cup.

Step 8: Repeat this until you have made 8 pizza muffin cups with crescent pieces, cheese, and sauce.

Step 9: Melt your tablespoon of butter and lightly brush it over the tops of your muffins.  You can add a sprinkle of parmesan cheese, garlic powder, or other desired seasonings at this time if you would like.
Step 10: Bake for 30 minutes.

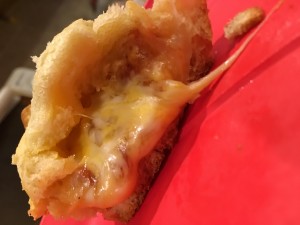
Pizza muffin

Pizza Muffin Pizza Muffin

Now, you have a super tasty pizza muffin that is fun for parties, kids, or the kid in you 🙂


Tuna Noodle Casserole with Parmesan Base

Ingredients:

2 cups egg noodles

2 cup milk

1 cup heavy cream

1/2 stick butter

2 oz cream cheese

1 cup peas

1 cup parmesan cheese grated

1 can albacore tunafish drained

(Optional: instead of 1 cup peas, you can do 1/2 cup of peas and a 1/2 cup of diced carrots)

Makes two servings.

First off, I have to admit that I had an absolute love for Betty Crocker’s classic tuna noodle growing up.  It was my favorite food that I always got on my birthday, and was easy for me to make myself as a teenager.  Then, after years of this addiction, they changed their recipe.  I was pretty sad about that, and turned to hard copies and virtual copies of tuna noodle recipes to get that same flavor.  However, I quickly realized that practically every recipe I ran into called for cream of chicken or cream of mushroom soup.  This never created the same taste as I remembered my favorite meal having.  Thus, my own version of what I thought a tuna noodle casserole should taste like.  I think the secret is in making an alfredo sauce instead of using the condensed soup route (not that that is a bad thing, but it wasn’t the flavor I was looking for).

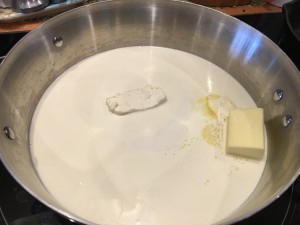
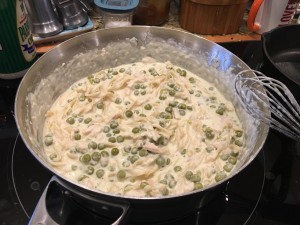
Tuna Noodle Base

Tuna Noodle Base


To start this recipe, we begin with the milk, heavy cream, butter, and cream cheese in a sauce pan.  Bring to almost a light boil while whisking to help dissolve the cream cheese.


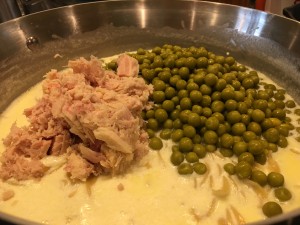
Noodles, peas, and tuna fish

Noodles, peas, and tuna fish


Once the cream cheese is blended and the liquid contents are almost to a boil, add the egg noodles, peas, and tuna fish.  Cook until your noodles are el dente by covering the saucepan with a lid, and turning the heat down to simmer for about 10-15 minutes.


Lastly, remove the saucepan from the heat and add the parmesan cheese.  Use your whisk to mix in the cheese.  It is important to not add the parmesan cheese too early because the cheese will curd instead of being a smooth texture.  You may get tuna fish, noodles, and peas in the whisk while doing this.  That is okay.  You can give your whisk a tap on the side of your saucepan and they will fall right out of your whisk.

image-4

Added in the parmesan

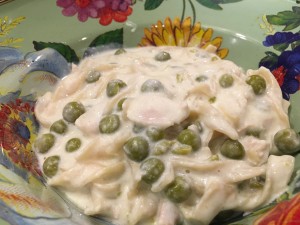
Now, it’s time to enjoy the fruits of your labor.  If you’d like, you can sprinkle a little more parmesan on your portion of tuna noodle casserole before serving.

image-6

Enjoy!


I hope you enjoyed my version of a classical tasting Betty Crocker tuna noodle. 🙂

Crescent Roll Crust – Asparagus and Ham Quiche

I wanted to prepare quiche for breakfast but was looking for a lighter alternative for the crust since most quiche recipes call for a standard pie crust. Standard pie crusts are made with a lot of fat and tend to be somewhat heavy and have a flaky, crumbly texture.

I considered using puff pastry, but it is very high in fat and would not have provided the texture of the crust I had in mind. Another possibility I considered was phyllo dough, but that would have resulted in a crispy flaky crust. Plus, although phyllo dough itself is low in fat, in order to achieve the layers it is necessary to brush between each, usually with either melted butter or olive oil.

A friend (who not so coincidentally loves them) suggested using crescent rolls for the crust. Unaware of any other examples of using crescent rolls as crust for a quiche, I decide to try an experiment and use them.

Here are the results.

Crescent Roll Crust Asparagus and Ham Quiche

CRESCENT ROLL CRUST – ASPARAGUS AND HAM QUICHE

Ingredients
5 Crescent Rolls (I used low fat)

1 T Butter
8 Asparagus Spears, fresh
¼ Ham cubed
2 T Jalapeno pickled, chopped canned
1 c Spinach leaves, fresh chopped

4 Eggs
1 c Cream, heavy whipping
½ t Pepper

Smoked Gouda

Instructions
Open the package of crescent rolls. Lay out 5 of them into a 9 inch pie pan starting around the top edge and pressing the dough until it forms a complete crust.

Bake crescent roll pie crust in 350 degree oven for 10 minutes.

Trim off the fibrous end of the asparagus spears and cut into 1/2 inch segments. Saute in butter until soft, add cubed ham and cook until lightly browned. Heat jalapeno pieces with asparagus and ham then place in baked pie crust.

Whip eggs with cream and pepper then pour over asparagus, ham, and jalapenos.

Thinly slice smoked gouda and lay over the top totally covering the quiche.

Bake Quiche in a 425 degree oven for 30 minutes, or until jiggling the pan indicates the middle is firm. The cheese will also start to brown.

This recipe resulted in a very creamy quiche with a perfect crust. I will definitely make this again.

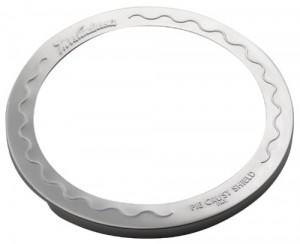
Pie Crust Shield

NOTE: You will need to either use a collar of aluminum foil or a pie crust shield to prevent the crust from burning while the quiche is baking. I got my pie crust shield for a reasonable price at Bed, Bath and Beyond. Check after 15 minutes of baking and if the crust edge is browning cover with foil or pie crust shield for the remainder of the time in the oven.

BTW – I baked the remaining 3 crescent rolls on a separate pan while cooking the crust the first time.

Homemade Corned Beef

As I have mentioned before the bulk of my interest in food comes from my parents, this post is one of their traditions that I tried to capture and share with everyone.  This tradition is a something that developed a few years ago and we’ve been doing every year since.  My family really enjoys corned beef, we also noticed that corned beef’s seemed to be of lower quality year after year, they just weren’t how they used to make them.  So we set out to create corned beef’s that reminded us of the corned beef’s of yesterday, but first a little history on the nobel corned beef.

Before we jumped blindly into this project we were curious on the history of corned beef, so we could better understand the tradition and even the scheduling of when and why they were made.  One of the first things we learned is the exact origins of corned beef has been lost, but it is generally agreed that it was done to preserve the meat and make less desirable cuts of beef more tender and flavorful.  A few hundred years ago there were no refrigerators and if you had to travel or survive a winter when your food supply migrated away from you, you had to find a way to survive.  If you’re optimistic and you or your tribe were extremely successful with hunting you’d want to preserve as much of the meat as possible, creating corned beef would be a great way to do this.

The next is the scheduling, why is it that the majority of American’s who eat corned beef eat it in March?  In most of North America March is the end or near end of winter, in order to make corned beef you need to be able to store the meat in a cold temperature for a long period of time.  Even in this day and age not many people have walk in refrigerators in their homes so that means leaving it in a garage or outside.  The main thing to do is keep the meat as close to 45 degrees F as you can for 10-21 days (different recipes call for different lengths of time, some go for much longer than 21 days).  During this time period you need to make sure the meat stays submerged in the brine and it’s generally recommended to give it a stir once a day.

So what is corned beef?  Corned beef is brined beef, typically brisket of beef.  The brining not only adds flavor, but it also tenderizes the meat and changes it’s color.  Brine is in it’s simplest form a pickling liquid which is made from water, salt, sugar and seasonings.  You probably see where this is going now, in order to make corned beef all you do is create the brine, chill it, place the beef in the brine, keep it cool for a few weeks while stirring once a day, ensuring the beef is submerged and then you have corned beef.  The theory is very simple, making all of these items come together in a way that resembles corned beef is a little trickier.

The exact recipe for the brine we use I do not have, Alton Brown has a good basic recipe for you to start with, after that batch you can start tweaking the ingredients to suit your needs.  One of the tricky items to find is Saltpeter, which absolutely must be used when making corned beef.  In addition to adding preservation to the meat it is responsible for the pink hue of the meat which is a staple of corned beef.  The ratio of seasonings, salts and sugar you use varied depending on the size of the batch you’re making.  It seems every year we make a larger and larger batch which is another reason I don’t know our ratio’s.

We start by grinding pickling seasoning, along with black peppercorns and other seasonings using a mortar and pestle.
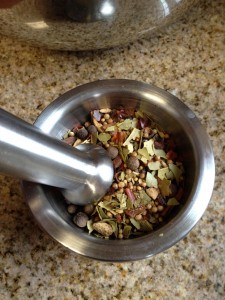
Grinding Pickling Seasoning

Then we add them to the brining liquid which we are heating on the stove to help aid in dissolving the salts and sugar.
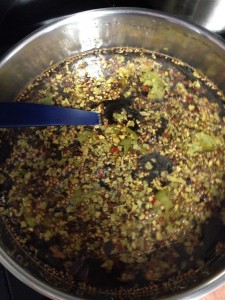
cooking corned beef brine

This is a catch 22 because as soon as everything is dissolved adequately we have to cool it, there is no simple or easy way to cool a lot of water so we just add ice until the temperature is correct.
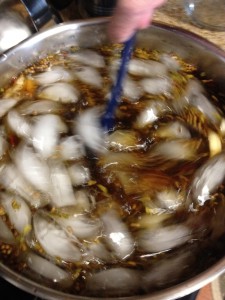
cooling corned beef brine

Once the brine is brought down to 45 degrees F we then add it to our brining vessel and the brining of the corned beef’s begins!
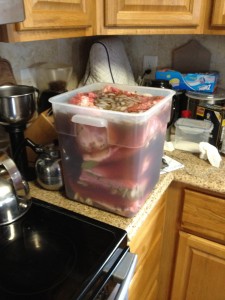
corned beef in container to be aged

Now we hurry up and wait 🙁 After several years of testing we’ve found that 3 weeks is the sweet spot for us. I cannot stress the importance of keeping them chilled, if you let the temperature increase even a little bit you run a risk of having bacteria enter the equation and the beef discoloring – which happened to us last year.  The outside of the meat turned gray but the inside was still an inspiring hue of corned beef deliciousness.  We ran into the problem because my family moved from NY to NC and winters down here just aren’t as cold so we had to get a cooler to keep our corned beef’s in with ice around it to keep it the right temperature.

After 3 weeks of daily checks and adding ice approximately every 3 days we are ready!  I present you with fresh, just out of the brine corned beef’s!
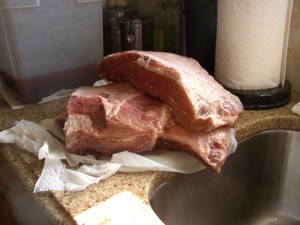
finished corned beef

We went a little crazy this year so we ended up using a vacuum sealer and plan on freezing the majority of the corned beef’s this year so we’ll have them throughout the year.  Here is the full harvest on my parents stove.
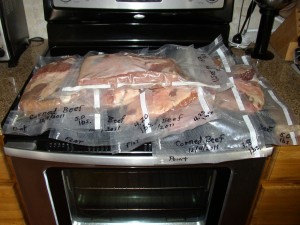
vacuum packed corned beef

We had our first one about 2 weeks ago now and I think this may have been the best batch to date.  The first year they were a little heavy on the garlic and cloves,  then we adjusted on the second year and they came out very good, last year we ran into the discoloration problem, but this year they are spectacular.

Cooking the corned beef’s is about as simple as it gets, simmer it for 2.5-3 (or longer depending on the size) hours and serve with your favorite corned beef sides!  Some people like to add seasonings such as cloves, carrots or other seasonings or aromatics to the braising liquid, we find ours to be so flavorful it’s just not needed.  Great leftovers, or as corned beef sandwich’s – how ever you like your corned beef this is the only way to go.

Below is an image of the first corned beef that we cooked – delicious!
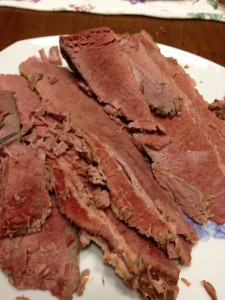
cooked corned beef