Archive / Tips and Techniques

RSS feed for this section

Cool tricks in the culinary world

Oster Beef Jerky Kit – Review

Oster Beef Jerky Kit

For Christmas last year I received several very nice presents from someone close to me who knows how much I love to entertain and prepare foods. One of those presents was an Oster Beef Jerky Kit.

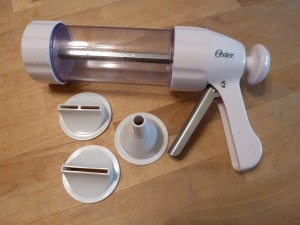
On the box it states this device will allow you to “Make Jerky at Home with Ease.” The kit includes a Large Jerky Press with Trigger, 3 tips for a variety of sizes, and 5 Jerky Seasoning and Cure Packets. I suspect there may have been an ulterior motive with this present since the giver and I go camping together.

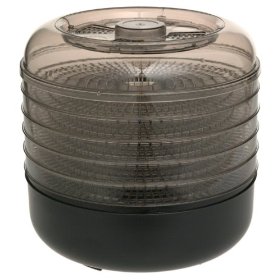
Dehydrator

After borrowing a food dehydrator for the purpose, I finally decided to try my hand at making my own jerky. The instructions were very straightforward and the kit has everything needed to make jerky except for the meat.

An advantage to making jerky using the press is that you use ground meat rather than purchasing whole pieces and slicing them. This makes the process both easier and less expensive plus the seasonings permeate the meat without having to wait for it to marinate.

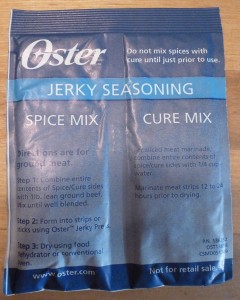
Jerky Seasoning

The process is very straightforward. Simply blend the ground meat with the ingredients in the seasoning packet (spices and cure), load the meat into the press, select the tip you want, and squeeze. The ‘soon to be’ jerky is extruded out the end in the shape you have determined, whether it is narrow or wide strips, or a round stick.

Jerky Press and Tips

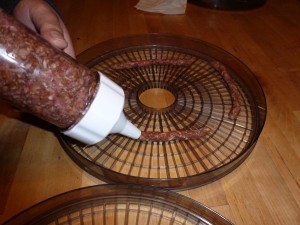
I recommend extruding right onto the dehydrator trays to minimize handling. Making a nicely shaped piece of jerky takes some skill which for me I think may take some time. It requires a steady hand and careful moving of the press as the meat comes out the end.

When the plunger in the press is extended to its farthest point there will still be enough meat in the tip to make more jerky. At this point you can disassemble the press and force it out of the tip manually. Or simply remove the meat from the press, roll or pat it with your hands into the desired shape, and place on the dehydrator tray.

Extruding the Jerky

Stack the trays in the dehydrator, plug it in, and let it do its work. Depending on the dehydrator, the thickness of the meat, and the amount of moisture needing to be extracted, the drying process can take from 4 hours to overnight.

Check the instructions on your dehydrator for the manufacturer’s recommendations and safe food handling information which will vary depending upon which type of ground meat you are using.

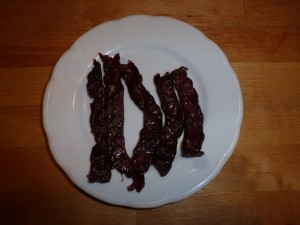
Beef Jerky

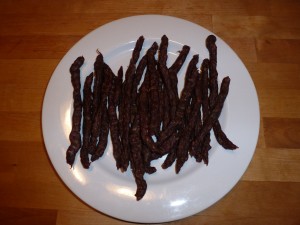
For this jerky I used lean ground beef, although you can use any kind of ground meat. Just make sure you are familiar with safe food handling practices for the kind of meat you are using as some require heating the jerky to a certain temperature even after drying and refrigerating until serving. For the batch of jerky sticks I added 1/2 teaspoon of cayenne pepper to the seasoning to give it an extra ‘kick.’

You don’t have to limit yourself to the seasoning packets available through Oster. After doing some research you can experiment with your own seasoning combinations. However, I can’t stress this enough – make sure you are aware of and observe safe food handling practices for the type of meat you are using.

Spicy Beef Sticks

Buying jerky can be very expensive and making it the conventional way can be difficult, time consuming, and costly. I found using the Oster Beef Jerky Kit for making my own jerky to be easy, quick, and inexpensive. As far as quality in comparison to packaged jerky purchased from the store, I found the jerky made using this method to be comparable.

You might expect jerky made from ground meat to be crumbly and unstable, but this process actually produces jerky of much the same texture as that cut from solid pieces of meat. For anyone who loves to eat jerky, and is willing to put in a little effort to save a significant amount of money, I highly recommend the Oster Beef Jerky Kit. It delivers what it promises by allowing you to  “Make Jerky at Home with Ease.”

Parmesan Hash Brown Potatoes

One item I love having  for breakfast when I can is Hash Brown Potatoes. It is very popular with most of the people I know.

Parmesan Hash Browns

The problem with the way many cooks are used to making Hash Browns is they often become a gray gooey mess because of the starches and liquid in the potatoes. There is a method to making crispy flavorful Hash Browns every time. The secret is after you shred the potatoes to rinse them thoroughly with fresh cool water, allow them to drain completely in a colander, then add in other ingredients to serve as binders for the Hash Brown patties.

Here is my recipe for seasoned Parmesan Hash Brown Potatoes that I think you will like.

PARMESAN HASH BROWN POTATOES

Ingredients
3 Potatoes, Russet medium

2 T Flour
½ c Parmesan cheese
1/8 t Cayenne (Red) pepper
¼ t Paprika
¼ t Salt, Kosher
¼ t Pepper, freshly ground

1 clove Garlic, minced

½ c Oil (for frying)

Instructions
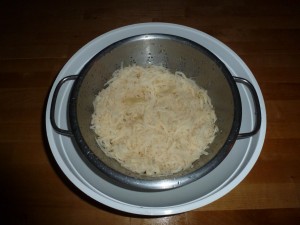
Peel and grate the raw potatoes. Rinse grated potatoes and place in colander to drain.

Shredded Potatoes for Hash Browns

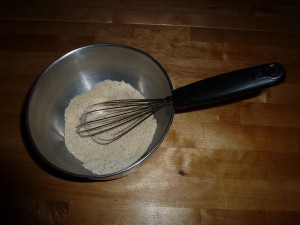
Mix flour Parmesan cheese and seasonings together  and combine with drained shredded potatoes.

Add oil to pan and heat on medium until a shred of potato placed in the hot oil begins to sizzle.

Form seasoned grated potatoes into patties and place in pan with hot oil. Cook five minutes per side, or until golden brown.

Hash Brown Seasoning Mix

After cooking, place patties on plate to drain and sprinkle with salt if preferred.

Bacon Wrapped Shrimp

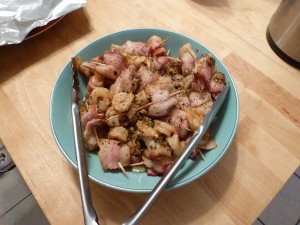
A few years ago, for our Christmas Eve family gathering, one of my concoctions became a new favorite. It it fairly easy to make, has bacon, shrimp, spicy seasonings, and can be eaten with your fingers – the perfect party food!

Bacon Wrapped Shrimp - cooked

I wanted to share this recipe with our readers because I am pretty sure that many of you after trying them will begin to include it along with pigs in blankets, onion dip and/or salsa with chips, cookies, brownies…….. Whatever is your holiday tradition.

Both you and your guests will love these.

BACON WRAPPED SHRIMP

Ingredients
2 lb. Shrimp, medium (about 90)
30 slices Bacon, thin
90 Toothpicks, round wooden

2 Limes, zested and juiced
2 T Sesame oil

2 t Salt, Kosher
2 t Pepper, black
2 t Hot red pepper flakes

Instructions
Preheat oven to 425 degrees F.

Cut bacon slices into thirds, making 90 pieces.

If using frozen shrimp, thaw under cool running water. Then peel. If using easy peel shrimp you can easily remove the shell by simply pinching the tail and the shrimp will pop out of the shell. Be careful to remove the entire shell.

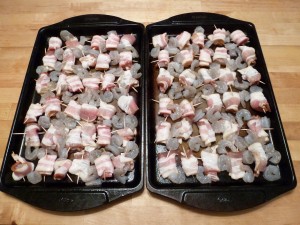
Once the shrimp are peeled, wrap each with one piece of bacon and secure with a toothpick.

Lay wrapped shrimp pieces in one layer on baking sheet.

Combine lime zest, lime juice (no seeds), Sesame Oil, Salt, Pepper, and Red Pepper Flakes.

Bacon Wrapped Shrimp

Brush seasoning mixture over wrapped shrimp, place baking sheet in oven and bake 5 minutes.

Remove from oven, turn, and return to oven for another 5 – 10 minutes, or until shrimp are pink & curled and bacon is cooked. It is very important to not overcook the shrimp.

Place on serving dish and enjoy!

Candied Pecans – Sugar Free

I have mentioned in previous posts the fact that I have a number of friends with special dietary needs. Because of this I make a special effort to produce items from my kitchen they can eat too.

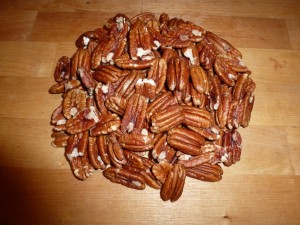
Raw Pecans Halves

I make this sugar free candied pecan recipe for a safe sweet snack they can enjoy. The coating has the taste and texture of cotton candy. Not only are they good to serve at parties, but they make a great gift too.

CANDIED SUGAR FREE PECANS

Ingredients
1 c Pecans, raw
1 egg white, lightly beaten
1/3 c Sucralose

Instructions
Preheat oven to 300 degrees F. Line a baking sheet with parchment paper.

Roast raw pecans in oven on the baking sheet for 10 minutes then allow to cool.

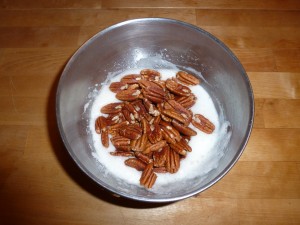
Beat egg white, blend in Sucralose, add nuts and toss to coat.

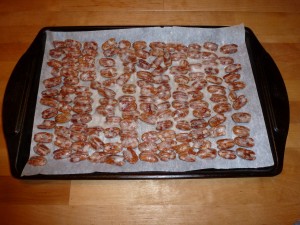
Pecans Ready for Coating

Spread mixture evenly onto baking sheet.

Bake 30 minutes or until nuts are toasted, stirring every 10 – 15 minutes. *

Pecans Ready for Roasting

Cool for 30 minutes.

If you prefer one of the following can be added along with the Sucralose and nuts.

1 t Maple flavoring
1 t Vanilla
2 t Cinnamon, ground

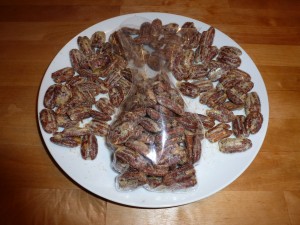
Candied Sugar Free Pecans

* As the pecans roast, the coating will begin to harden. As it does, it is important to separate the nuts or they will stick together. Also, you will need to ‘work’ the baked nuts after cooking to remove excess coating. Make sure not to pack the loose coating in with the finished nuts if you are giving them as a gift.