Archive / Tips and Techniques

RSS feed for this section

Cool tricks in the culinary world

Five Mother Sauces

Many years ago, mostly as a result of the French Revolution and the subsequent reduction of the great houses of France and their kitchens with essentially unlimited resources and help, professional cooks began the process of simplifying their work. One of the major contributions of this period, documented by Antonin Carême, and later expanded upon by Auguste Escoffier, was the development of the categories of master sauces. These master sauces were intended to be the basis of all other sauces, needing only the addition of a few ingredients to customize them to a particular dish.

Sauces provide flavor in liquid form and with a pleasing consistency. They are used to enhance the flavors of the dish. Through sauces the cook has a broad range of flavors at hand. Although sauces can be made of fruit, soy, grains, fish, and also include gravies, the earliest European sauces focused primarily on meat reductions. Sauces that were thickened with flour were much more economical than those thickened with meat reductions so became much more popular during that time period.

Previously, we at Lukewarm Legumes started our Saucier series of blogs. This will serve as an introduction to that series by providing part of the history of sauces.

The earliest categories of sauces in Europe were these four:

Espagnole (brown sauce): made with brown meat stock (beef or veal), brown roux, and tomatoes.
Velouté (velvety): made with white stock (fish or chicken) and yellow roux.
Béchamel: made with milk and white roux
Hollandaise: made with butter, eggs, and lemon juice

Later Tomato Sauce would be included in the list.

Today we will focus on Hollandaise Sauce.

Hollandaise Sauce

Everybody knows that oil and water do not mix; except, when blended in the presence of an emulsifier. The yolk of the egg is itself an emulsion of oil and water with the capability of emulsifying a vast amount of additional liquid. In speaking of another emulsion sauce, mayonnaise, Harold McGee says, “Though cookbooks often say that the ratio of oil to egg yolk is critical, that one egg yolk can only emulsify a half-cup of oil, this just isn’t true. A single yolk can emulsify a dozen cups of oil or more…” (On Food and Cooking, p.634).

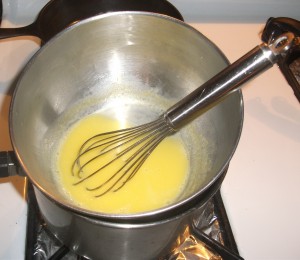
Hollandaise Sauce is perhaps one of the most feared sauces to make because of the possibility of curdling the eggs. The important thing to remember is to first blend the egg yolks with the lemon juice. Adding the lemon juice and its acidity helps prevent curdling of the eggs. Using a double boiler will provide a gentle and even heat. The trick is to fully incorporate small slices or butter fully into the egg yolks before adding more and to heat the egg yolks enough to produce the desired thickness, but not so much as to cause the yolk proteins to curdle into solid form.

Here is a basic Hollandaise Sauce recipe:

HOLLANDAISE SAUCE

Ingredients
2 egg yolks
1 t Lemon juice
2 t Water

8 T Butter (one stick), cut into small pieces
1/2 teaspoon kosher salt
1/8 teaspoon cayenne pepper

Instructions
In the top part of a double boiler over medium heat, whisk egg yolks, lemon juice and water until warm enough to melt the butter.

Add butter slices one at a time, whisking until fully incorporated.

After all butter has been added, whisk in salt and cayenne pepper.

Now that you know how quick and easy it is to make this delicious sauce, why not serve it warm over a fried (or poached) egg and ham on an lightly toasted English Muffin for breakfast tomorrow?

One of the Great Comfort Foods – Macaroni and Cheese

Everybody has their favorite comfort foods. Comfort foods provide comfort in a number of ways including being easy to eat and flavorful. They can also be foods that remind us of pleasant times in our lives, such as our youth. They may be foods our mother or grandmother made and/or are of an ethnic or geographic variety that reminds us of a place we used to call home.

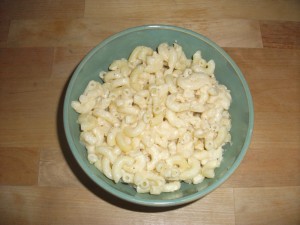
One of the great comfort foods is Macaroni and Cheese. It really surprises me at how many boxes of Macaroni and Cheese mix are sold in stores. The surprise is not that Macaroni and Cheese is popular, but that since making Macaroni and Cheese from scratch is so easy and good, why anyone would make it from a box. The only thing the package saves you from is measuring the noodles and shredding the cheese. You still have to cook the noodles as well as measure and add the butter & milk. Plus homemade does not contain chemical additives.

Today was a comfort food day for me and in observation of that fact I made Macaroni and Cheese – from scratch, since I do not keep the boxed variety in my pantry.

Macaroni and Cheese

Here is my recipe:

MACARONI AND CHEESE

Ingredients
1 c Macaroni noodles
Water

2 T Butter
1/2 c Milk (or cream for an even richer tasting dish)
1 c Cheddar cheese, shredded *
1/2 t Salt, kosher
1/8 t Pepper, freshly ground

Instructions
Boil enough water in a pot to cover the macaroni noodles. Add noodles and boil until cooked to the desired tenderness, usually about 10 minutes. Drain noodles. Add butter to pan and melt. Then add milk, shredded cheese, salt and pepper. Cook and stir over medium heat until thick and bubbly. Add cooked noodles and stir until coated with cheese sauce.

* Although I believe in being economical, one place I never scrimp on is the quality of ingredients. Preparing dishes from scratch helps enable me to do this because I save on the costs added in by manufacturers of prepared food to cover their labor and packaging expenses. For preparing this recipe I highly recommend using a good quality cheddar cheese. I appreciate that my local grocer stocks Tillamook Cheese and prefer their Sharp Cheddar. Tillamook is one of many quality cheeses available from dairies in the U. S. I am very thankful to have had the privilege of touring their facilities in Tillamook, Oregon several times.

How to Maintain Your Kitchen Knives

With proper maintenance, a little care and some patience a quality set of kitchen knives can last well beyond our lives.  In this post I will share with you tricks, tips and even show you what will happen if you do not take care of your knives.  In a previous post, Finding the Right Kitchen Knives, I shared with readers some tips on finding a set of kitchen knives that will provide you with a lifetime of enjoyment.  In this post I will go over tips, tricks, debunk some myths and share plain common sense to make sure your investment is protected and functioning optimally.

The first thing I will mention falls into the common sense category, always use a cutting board if at all possible.  Sometimes you just can’t, cutting a large cut of meat, or whatever else may come along in your culinary travels that would prevent you from using a cutting board.  When choosing a cutting board always try to use, wood, plastic or rubber.  Using other types of cutting boards, such as glass, metal or marble can actually damage your knives in a very short period of time, this includes cutting on ceramic plates – don’t do it!  I had a roommate several years ago who refused to use a cutting board for whatever reason and he damaged one of my knives, below is a close up of the blade from the damage, this is VERY bad, you never want your knives to look like this.

Damaged Kitchen Knife Blade

As you can see there are several large and small pieces of the cutting edge missing, this was as a result of not using a cutting board,  instead the center metal portion of the kitchen sink as his cutting board – for your sake, for your knife’s sake please don’t do that!  The good news is the damage above can be fixed, though it should never have happened to begin with, more on the repair later in the article.

Another simple rule I like to adhere to, this is more of a cautionary measure, hand wash knives immediately after use.  Don’t leave them in the sink  and don’t put them in the dishwasher.  Knives are typically very easy and quick to wash by hand, so this is not a big time consuming task.  The reasons not to leave them laying around seem pretty obvious, first of all you are significantly more likely to have an accidental injury if they are just laying around, quality kitchen knives are razor sharp.  Secondly, there is a greater chance of damaging the knife itself if it’s laying around, something could fall on it and bend the blade or hit the blade and damage it similar to what you see above.  Bottom line, most quality knives are dishwasher safe, but I think it’s unwise to clean them that way.

Using a knife steel is one of the most misunderstood and incorrectly performed tasks in the culinary world.  It’s a very simple task to perform with 10 minutes of practice and is one of the best things you can do to maximize the lifespan of your knife’s edge.  Before I share the examples with you, please understand that a knife steel is not a blade sharpener as most people understand it, it is a blade “re-aligner” meaning it will keep your blade sharp, but it will not make a dull blade sharp.  The damaged blade above can not be fixed with a knife steel.  There are so many great examples online of how to use a knife steel I won’t bore you with it, but rather link you to it.  Here’s a fantastic write up on how to use a knife steel.  If you are more of a visual person here is one of my favorite blogging Chef’s, John Mitzewich, demonstrating how to use a steel and explaining visually what I mentioned above about it not sharpening the knife.

With a little practice you’ll become a whizz at using a steel and it’ll become a regular habit every time you use your knives, which is a good thing!  Because I used a steel since my knives were new, with the exception of the knife above none of my knives have ever needed to be sharpened, they are all still extremely sharp and after 6-7 years the most used knives are to the point that I am thinking about finally actually sharpening them.

Sharpening a knife requires a stone, in the world of fine kitchen knives that typically means a whetstone or oilstone, these are flat, typically rectangular stones that you would use dry or apply oil or water to depending on the type of stone.  This is one area that there is a huge range of variables on and there is no black and white answer, some stones are better with moisture others are better dry, some feel using a stone with a liquid lubricant can create an uneven edge because it suspends the fine blade particulate and creates uneven spots on the blades edge.  Which ever direction you go in, the process is very similar to using a knife steel, here’s a link to learn more about using a knife sharpening stone. This is one area you may want to pay a professional to sharpen them if you have any doubts, the good news is much like with using a knife steel with a little practice and patience you can get very good at this too.

The only other tips I have to maximize the life of your knives is to be gentle with them, they are tools that are designed to be used, but don’t confuse that with abusing them.  Don’t violently stab, or chop things chaotically, be graceful and calculated when cutting and you’ll become more efficient and effective with your knife skills.  With practice and time you’ll become faster and more confident.  Keep in mind the chef’s you see online cutting super fast probably cut more food in a day than the average at home chef does in several months.  Be safe, use your head and don’t be afraid to keep pushing the limits with your knife skills, it’s a very rewarding skill set.

Taco Seasoning Mix

During times of economic difficulty most of us look for ways to cut back on our expenses. Often one of the first places people look at for reducing their budget is food. Some people will start by cutting back on eating out and then turn to reducing expenses in their own kitchen.

Tacos

One way to cut back on expenses yet continue to eat the foods you love while maintaining their quality is to make mixes from scratch rather than pay the extra cost tacked on by manufacturers for the labor and packaging used to provide their convenience. A mix that is easy to make and costs about 1/10th of what you would pay for a packet of mix is Taco Seasoning.

This recipe makes a really good tasting taco. It is easy to make, inexpensive, keeps well, and my son loves it so much I at one time made a big batch, packaged it nicely, and gave it to him as a gift. He loved it!!!

Taco Seasoning Mix

Here is my recipe for Taco Seasoning Mix:

TACO SEASONING MIX

Ingredients
5 t Cayenne pepper
20 t Chili powder
10 t Cumin, ground
20 t Garlic powder
20 T Minced dried onions
5 t Salt
10 T Flour

Instructions
Mix all ingredients together and store in an airtight container.

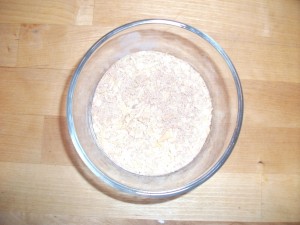
Taco Seasoning Mix - Mise En Place

When ready to make your Tacos, add 4 Tablespoons Taco Seasoning Mix to 1 pound ground meat and 1/2 cup water. Mix and simmer in a pan until cooked.