Archive / Tips and Techniques

RSS feed for this section

Cool tricks in the culinary world

Fat and Sugar Free Chocolate Cake

Ever dreamt of trying a truly decadent dessert which you wouldn’t later regret eating? This chocolate cake recipe was inspired by a friend of mine who cannot have sugar and has to limit fats in her diet (but loves sweets). Most recipes for sinless, guiltless chocolate cake are either low/non fat OR sugar free, but it is very difficult to find a fat AND sugar free recipe that works. This is because sugar and fat contribute a lot to the structure of the final baked cake.

Fat and Sugar Free Chocolate Cake

Not only is this chocolate cake enjoyed by those who are watching their intake of fats and sugars, but also by everyone who has tried it. It’s always a big hit at the office parties where it has been served. I’m sure you will enjoy it too, whether you need to cut back or not.

Here is how I make it:

FAT AND SUGAR FREE CHOCOLATE CAKE

Ingredients
1 c Milk, nonfat
2 Eggs
½ c Applesauce, unsweetened
2 t Vanilla

1 ¾ c Flour
2 ¼ c Sucralose (Splenda)
¾ c Cocoa powder, unsweetened
1 ½ t Baking powder
1 ½ t Baking soda
1 t Salt

1 c Water, boiling

Instructions
Preheat oven to 350. Coat a 9 x 13 baking pan with cooking spray.

Blend eggs, milk, applesauce and vanilla in a large mixing bowl.

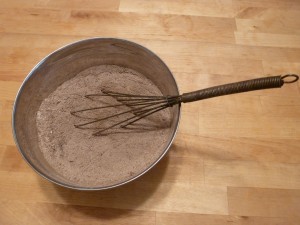
Combine dry ingredients and add to liquid mixture. I recommend using Dutched Cocoa if possible. That and the boiling water contribute to the deep dark brown chocolate color of this cake giving the impression of richness.

TIP: I often use a large French Whisk to mix dry ingredients. While accomplishing the mixing, it also helps break up large chunks of dry ingredients and is easy to clean afterwards.

Dry Ingredients

Beat with electric mixer at medium speed for two minutes.

Stir in boiling water slowly and mix thoroughly.

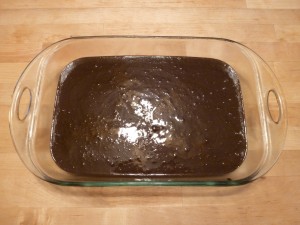
Pour into pan (it will be very watery, but this is normal), place in oven and bake for 30-35 minutes or until a toothpick inserted in the center comes out clean.

  Cake Batter

Cool completely if you will be icing the cake, which I recommend. I don’t recommend removing this cake from the pan to serve as its structure is very fragile.

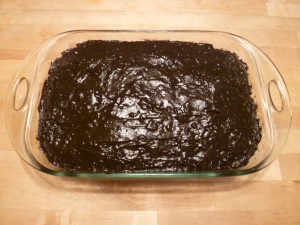
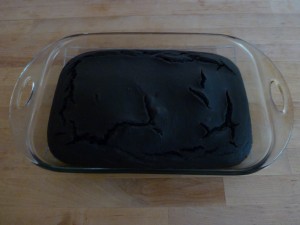
As you can see from the following image, it is normal for this cake to have cracks after baking. That this cake has no fat or sugar also accounts for the reason it does not rise as much as a regular cake. The standard method for making cakes from scratch is to use the Creaming Method.

In the Creaming Method the sugar and fat (butter for cakes) are first blended together. The purpose of this blending is not primarily to soften the fat, but to add air bubbles. Then the leaveners (Baking Powder and Baking Soda) create the gases which cause those bubbles to expand. These bubbles are responsible for the final texture of the cake. Additionally, butter (which this cake does not have) contributes to the ‘moistness’ of the cake, which helps hold it together.

After Baking

It is because this cake has a tendency to form cracks that I recommend it be frosted, especially if you will be serving it at a party. Frosting, at least in cake baking anyway, covers a multitude of sins. 🙂

Here is the recipe I used for frosting the cake. It is essentially a thick chocolate pudding and although it does call for adding one tablespoon of butter, that amount of fat is pretty negligible in comparison with the composition of the cake as a whole.

SUGAR FREE LOW FAT CHOCOLATE ICING

Ingredients
½ c Cocoa powder, unsweetened
4 T Corn starch
1 c Sucralose
1/4 t Salt

2 c Milk, nonfat

1 T Butter
2 t Vanilla

Instructions
Mix together cocoa, corn starch, sucralose and salt. Add milk slowly and stir. Cook until thickened, stirring continuously. Add butter and vanilla. Cool, and then spread on the cake.

Perfect Popped Popcorn

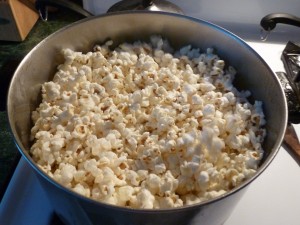
I don’t know about you, but I love popcorn. So does my household. I have been using a technique for years to make popcorn that always gets rave reviews. One of the secrets is to facilitate the release of the steam produced in the process away from the popped corn. This results in a much lighter and crisper popped corn.

Popped Popcorn

Popcorn is a whole grain healthy snack providing fiber, antioxidants, protein, B vitamins & minerals, and includes polyphenols similar to that contained in fruits and vegetables which could help reduce the incidence of heart disease and cancer. Its nutritional value can be fortified by sprinkling it with Parmesan Cheese, which provides additional protein and calcium. Another use is to make it part of a snack mix including dried fruits, nuts, and unsweetened cereal. Plus popcorn can be used to make popcorn balls for your next party.

Here is my method:

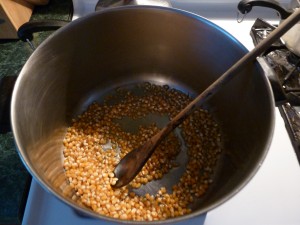
Popcorn and Oil

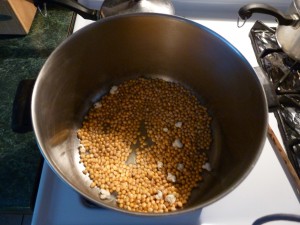
First place two to four tablespoons of vegetable oil (I like to use corn oil) in a large pot with one cup of popcorn kernels. Over medium high heat stir the popcorn and oil mixture until the kernels begin to pop (stirring helps to evenly heat the kernels and help popping). Even though you might have to deal with a few flying kernels of popcorn using this method I think you’ll find it well worth the trouble. Another tip with popping corn is to make sure you have the heat high enough, or the kernels will not pop properly.

Popcorn Starts Popping

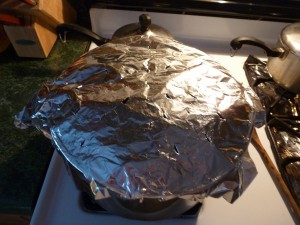
Once the kernels begin to pop, cover the pot with a sheet of aluminum foil that has slits cut into it to allow for the release of steam. At the point the corn has popped enough to prevent the kernels flying out of the pan, uncover the popcorn and allow it to completely pop.

Covered Popcorn

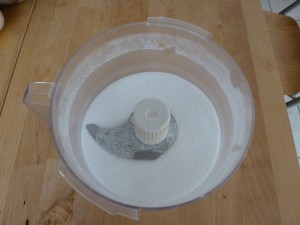
If you like to salt your popcorn, you don’t need to purchase popcorn salt, which can be relatively expensive, but can easily make your own by placing a cup or two of regular table salt into your food processor and processing until it becomes a very fine powder.

Popcorn Salt

How to Make Juicy Chicken

Chicken seems to be one of those things that really  gives a lot of people a hard time.  When you buy it from the store, meat market or wherever you find your chicken it is boring, bland and rather plain by itself.  I hope we all know chicken needs to be cooked, you can’t eat raw chicken or even partially cooked chicken, so it must be cooked entirely.  This is where a lot of people get thrown, you can grill it, fry it, bake it, pan sear it, braise it, oven roast it and the list goes on.  The most common complaint I have with chicken is that it is over cooked then served dry and lifeless, just because it has to be cooked through does not mean it has to be dry, boring and dull.

That’s where this post comes in, one of the best kept secrets in the restaurant world is brining chicken, brine is simple to make, easy, cheap to make and keeps chicken flavorful and juicy.  The basic recipe for chicken brine is 8 cups of water, 1/2 cup of salt (if using iodized salt reduce the amount of salt being used) and 1/4 cup sugar – that’s it! I know it sounds simple, even unusual but it works!

The next item is how long you brine your chicken, you don’t want to over do it or it will be so overly salty you won’t enjoy the meal.  Below is a rough guide depending on the piece of chicken you are brining.

Whole Chicken 4-8 hours

Half Chicken 3-6 hours

Bone-in Skin-on Breasts 1-2 hours

Boneless Skinless Breasts 30-60 minutes

Legs and Thighs with Skin 45-90 minutes

Skinless Legs and Thighs 30-45 minutes

As you can see it doesn’t take long at all, in particular for boneless, skinless breasts, which I think need the most help when cooking.  Just by adding this extra treatment your chicken will retain moisture, flavor and not that it is impossible to over cook and dry out but greatly reduces the chances.

Now comes the real fun with brining, you can mix up the ratio’s a bit to suit your desired flavor profile or even add other components to your brine.  For example, some people like less salt, some people like more, I strongly urge people to cook with sea salt (aka kosher salt) if it’s at all possible, it doesn’t have as sharp of a taste and allows you to fine tune your cooking better; if you’re using iodized salt please proceed cautiously when increasing the amount you’re adding.  I typically always add some fresh ground pepper to my brine so feel free to experiment with that as well.

You can add virtually anything else that would impart flavor that you’re looking for, such as crushed garlic cloves, minced onions, cumin, rosemary, thyme and the list goes on and on!  What ever you would normally cook your chicken with you can probably add to the brine to infuse those flavors into the chicken.  I normally don’t go over board with additional flavorings, but it’s fun to try new things.

With Thanksgiving around the corner I’m sure some of you are wondering if you can brine a turkey and the answer is YES!  A few years ago we made a fried turkey at my parents house on Thanksgiving and we had brined it for I believer 2 or 3 days prior and it was one of the best turkey’s I’ve ever had – and I love turkey, it’s my favorite meal.  With the brined, fried turkey it created this unbelievably amazing crispy, perfectly seasoned skin that I’ve ever had, just think about it takes me to a special place.

After you create the brine just place the cleaned chicken or chicken pieces in it for the times that are listed above, after the time has passed remove the chicken, wash it with clean water once or twice and prepare it as you normally would.  I love brined chicken on a grill, but it’s also great pan seared, or virtually any method you wanted to cook it.  I don’t think you need to brine chicken if you’re poaching or braising it, you’ll be cooking in flavor with those methods and brine won’t add much but it would make for a great experiment.

You can brine meats other than just poultry, but not all meats respond well to brine, I’ll have a follow up post soon about other meats that are great to try with brine.  If you come up with any additional flavorings that you find work well I’d love to hear about it!

Wonton Feast

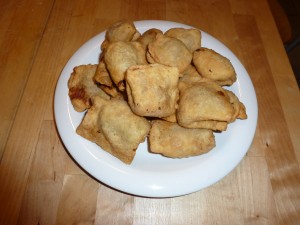
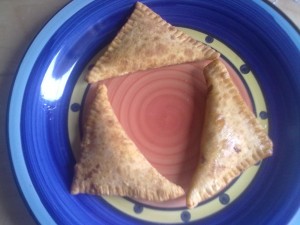
Fried Wonton

Wontons are an inexpensive and versatile food item that can be the basis for a wide variety of dishes. They are so versatile, in fact, that this last weekend I planned a whole meal around dishes made with wonton wrappers. Wonton wrappers can be used as the foundation for a wide variety of appetizers, soups, side and main dishes, and even desserts.

The name wonton means literally ‘swallowing a cloud.’ Wontons have a long and rich history {predating the Tang Dynasty (circa 618 – 907 CE)} originating in Northern China as a sealed stuffed bun called ‘Huidun,’ or chaos. It is even said that a doctor, Zhang Zhongjing (circa 150 – 219 CE), filled wontons with medicinal herbs as a cure for frostbite. During the Tang Dynasty, a distinction began to be made between the wonton wrapper, which was typically a triangle with 2 – 3 inch sides, and the dumpling, made from a round piece of dough about 3 inches in diameter.

Although making wontons from scratch may appear to be a simple operation it can be very difficult and challenging. For this reason, and the time involved, many cooks prefer to purchase readymade wrappers. Of course, always intrigued with a kitchen challenge, I decided to make the wrappers (six batches in all) for this feast myself.

As mentioned before, there came to be a distinction between wontons (typically fried) and dumplings (typically boiled or steamed). Because of this potstickers, or Chinese Dumplings, deserve a special mention since they are prepared with a combination of the two cooking methods. Legend is that potstickers were created by a royal chef who pan fried wontons for his master’s meal, but overcooked them turning the bottoms black. Not having enough time to make another batch, he added broth to the pan and steamed the filled wontons, turned them over with their blackened side up, and presented them as a new creation. Fortunately, for the chef and his neck, they were a big hit!
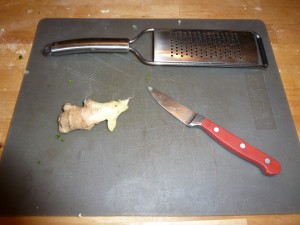
Fresh Ginger

Some of these recipes call for using fresh ginger. Ginger is usually available in the produce section of your local grocer. When buying fresh ginger, choose a piece about the size you need which is firm, smooth, and free of mold. It should also have a paper thin skin which easily rubs off with your fingernail. After peeling away the skin you should smell a strong fresh ginger scent.

The menu I came up with for this feast is as follows:

STARTER
Fried Wonton
Crab Rangoon

SOUP
Wonton Soup

SIDE DISH
Potstickers

MAIN
Three Delicacies Wonton (San Xian Hun Tun)

DESSERT
Banana and Chocolate Wontons

SAUCES
Sweet and Sour
Chinese Brown Gravy
Chinese Mustard

The first thing to be made was the wonton wrapper dough.

WONTON WRAPPERS

Ingredients
1 egg
3/4 t Salt, Kosher
2 c Flour
1/2 c Water

Instructions
Lightly beat the egg, salt, and water. Mix together with flour in a bowl. Adjust water or flour to make a dough. Knead until smooth, about five minutes. Cover and let rest for thirty minutes. Turn dough out onto floured surface and roll out very thin into a rectangle which is about 21 x 14 inches. Cut into 3 ½ inch squares (makes 24 wrappers). Next add the filling, about one teaspoon per wrapper, and seal by folding the square into a triangle. Then take the small ends and pull them together forming a purse shape. It is very important to carefully seal the wrapper. You may need to wet the edges of the wrappers to help the dough adhere to itself.
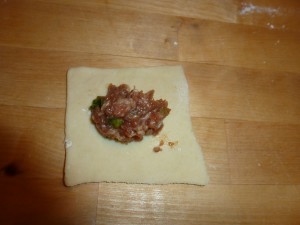
Filling a Wonton

Here are the filling recipes I used:

FRIED WONTON

Ingredients
1 leaf Bok choy
1 Green onion
½ t Fresh ginger, grated
½ lb. Pork, ground
1 T Soy sauce
1 t Sesame oil
1 t Sugar
Pinch of salt
1 egg, lightly beaten

Oil for frying. I like to use Peanut Oil for Asian dishes, but you can use whichever oil you prefer.

Instructions
Chop the bok choy and green onion. Mince the ginger until you have 1/2 teaspoon.

Combine all ingredients in a bowl. Fill wonton wrappers with this mixture and seal.

Heat the oil to 375 degrees adding the wontons one at a time and cook until evenly browned, being careful not to crowd too many in the pan. Remove and drain on paper towels. Serve warm while they are still hot and crispy with Sweet and Sour Sauce and Chinese Hot Mustard.
CRAB RANGOON

Ingredients
6 oz. Crab meat, canned or fresh
6 oz. Cream cheese
1 Jalapeno pepper, chopped
1 Green onion, chopped
¼ Red onion, chopped
1 Garlic clove, minced
½ t Soy sauce
½ t Worcestershire sauce
Black pepper, to taste

Instructions
Combine all ingredients in a bowl. Fill wonton wrappers with this mixture and seal.

Heat the oil to 375 degrees adding the wontons one at a time and cook until evenly browned, being careful not to crowd too many in the pan. Remove and drain on paper towels. Serve warm while they are still hot and crispy with Sweet and Sour Sauce and Chinese Hot Mustard.

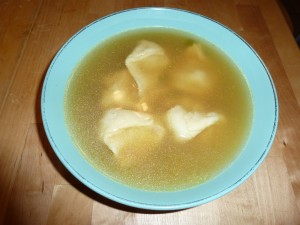
Wonton Soup

WONTON SOUP

Ingredients
½ lb. Pork, ground
1 Green onion, finely minced
1 t Cornstarch
½ t Sugar
Black pepper, to taste
1 t Sherry
1 T Soy sauce
1 T Oyster sauce
Dash sesame oil

6 c Chicken broth
1 Green onion, chopped

Instructions
Combine all ingredients in a bowl. Fill wonton wrappers with this mixture and seal.

Bring the chicken stock to a boil and add the wontons, cooking until they float. Add green onion and serve.

POTSTICKERS

Ingredients
1 lb. Pork, ground
1 c Napa cabbage, chopped
2 Green onions, chopped
1 T Sherry
1 t Sesame oil
1t Salt, Kosher
1 t Cornstarch
Black pepper, to taste

½ c Chicken broth

Instructions
Combine all ingredients in a bowl. Fill wonton wrappers with this mixture and seal.

Add 1 tablespoon oil in a skillet and heat to 375 degrees. Fry for two minutes, or until the dumpling bottoms are golden brown.

Add ½ cup chicken broth to skillet, cover and steam for six to seven minutes, or until the broth is absorbed.

Serve with Chinese Brown Gravy.
THREE DELICACIES WONTON (San Xian Hun Tun)

Ingredients
2 Filets, tilapia, cut in chunks
16 Shrimp, medium raw, cut in thirds
1 lb. Pork, ground

1 c Napa cabbage, chopped
½ Red onion, chopped
2 Green onions, chopped
1 T Fresh ginger, grated
1 Carrot, large shredded
1 T Sherry
2 T Oyster sauce
1 T Sesame oil
1t Salt, Kosher
2 T Cornstarch
Black pepper, to taste

½ c Chicken broth

Instructions
Combine all ingredients in a bowl. Fill wonton wrappers with this mixture and seal. Since this is the main dish, make the wonton wrappers much larger and use an equivalent amount of filling in each. These can also be steamed or fried rather than prepareed like potstickers.

Add 1 tablespoon oil in a skillet and heat to 375 degrees. Fry for two minutes, or until the dumpling bottoms are golden brown.

Add ½ cup chicken broth to skillet, cover and steam for six to seven minutes, or until the broth is absorbed.

Serve with Chinese Brown Gravy.

Crab Rangoon

CHOCOLATE BANANA WONTONS

Ingredients
2 Bananas, ripe diced
½ c Chocolate chips

Powdered sugar

Instructions
Combine all ingredients in a bowl. Fill wonton wrappers with this mixture and seal.

Heat the oil to 375 degrees adding the wontons one at a time and cook until evenly browned, being careful not to crowd too many in the pan. Remove and drain on paper towels. Dust with powdered sugar and serve warm while they are still hot and crispy.

BAKED
Preheat oven to 350. Place filled wontons on cookie sheet and bake until golden brown, about 10 to 12 minutes. Dust with powdered sugar and serve warm while they are still hot and crispy.

Here are the recipes for the sauces:

The Sweet and Sour Sauce recipe can be found in a previous blog.

CHINESE HOT MUSTARD

Ingredients
½ c Mustard, dry
½ c Water, cold
¼ t Oil, cooking

Instructions
Combine all ingredients in a bowl, cover and let stand for one hour before serving.

CHINESE BROWN GRAVY

Ingredients
1 ½ c Chicken broth
1 t Molasses
1 t Soy sauce
1 T Oyster sauce
2 T Cornstarch
2 T Cold water

Instructions
Combine cornstarch with cold water, add to remaining ingredients and cook over medium heat, stirring continuously until smooth and thickened.

I hope this article will encourage you to make dishes using wonton wrappers.

Whether you use these recipes, or others, I believe you will really enjoy preparing and serving dishes made with wontons to your family and friends.